Wood plans “+10,000 Step By Step Plans ...even if you don't have a large workshop or expensive tools!“ Click Here 👈 Transcri...
Wood plans
“+10,000 Step By Step Plans ...even if you don't have a large workshop or expensive tools!“ Click Here 👈
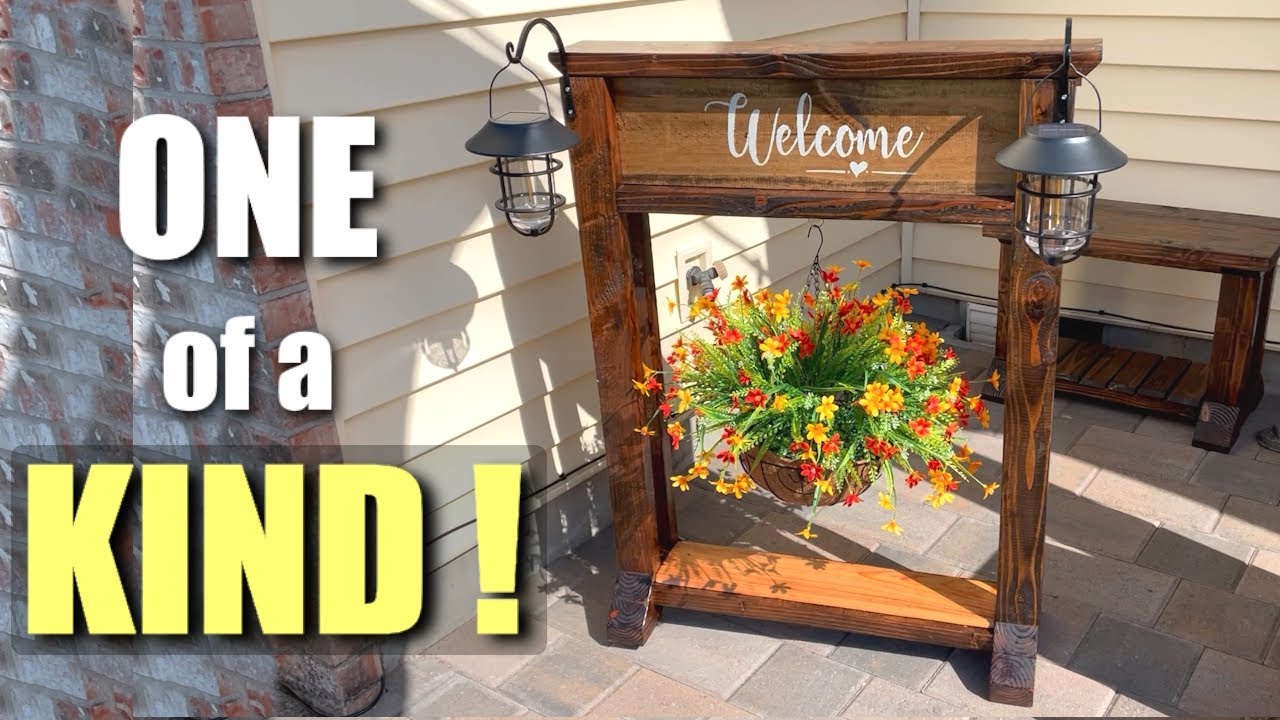
Transcript hi guys Ryan here I'm going to show you how I built this beautiful hanging plant stand that has improved our entryway and impressed our neighbors I know because they've told me so now beside the overall look there are two features that I believe set this apart from what you'll normally see in a neighborhood stand first is the solar lantern lights and hooks check out how they look with this night shot they stay on all night too now the second feature is a hidden one and I'll get to that during the build but it's one that really sets us apart from a normal welcome stand the stand is simple to build here's how I did it I build the leg assemblies first I start out with four two by fours at 38 inches long I then decide what will be the inside of the legs and a mark for a pocket hole in the center at the top this is going into a two by six top so I'll do one and a half inch pocket hole setting while I'm set up for pocket holes I Mark and drill on the two bottom stretchers they are one and a half inch square 26 inches long and the sign shelf it's a two by six at 26 inches long once the holes are drilled I place two of the legs side by side in the proper position pocket holes at the inside top facing each other then I clamped two two and a half inch spacer blocks one at the top and one toward the bottom this will keep the legs in place while I attach the top part of the bottom leg assembly now this top part of the assembly this is a two by four piece that has each end cut at 45 degree angle and it is eight and a half inches from Long Point to Long Point I use tight Bond three glue since this is going outdoors and then use my long clamp and a board on the top end to clamp it in place I pre-drill for four two and a half inch deck screws two on each side going into the leg next I place the top spacer down seven and a half inches from the top I clamp and put one screw on one end of each side it's really secure and it's one less screw hole to fill with putty now I glue clamp and screw in the bottom piece of the leg assembly this piece also has 45 degree angle cuts on both ends and it is 11 and a half inches long point to point foreign next up are the feet they are four and a half inches long with the bottom inside corner cut at a 45 degree angle and positioned as shown I glue a nail at Each corner making sure I'm far enough in on the outside edge so the nail doesn't come out the other side now the first leg assembly is finished I'll show the second one uninterrupted so you'll get a better idea how simply and quickly this can go now in this one I wound up doing the feet before the top stretcher block but it really doesn't make a difference foreign stretchers with the pocket holes facing down I line them up with the legs so they should be five and a half inches from outside edge to outside edge there are several ways you can do this of course depending on your workstation I just think on the Fly and clamp this to my bench it gets the job done here I've clamped some wood under the spacer so I can lay the Shelf in and have it line up with the spacer blocks then I clamp and screw in the pocket hole screws now here's the hidden feature I talked about earlier I place a three-quarter inch square rail in the middle of the Shelf as well as in the middle of the bottom side of the top board and that leaves me room for two sign boards to slide in giving a total of four possible signs to have on hand now if you don't want the lantern lights you could use this as a reversible stand and flip it around to show side too you could even replace the two three quarter inch thick boards with six quarter inch ones and have 12 sides the top is a two by six that is 35 inches long and I cut a 45 degree angle on the underside of each end as shown here as far as the bottom stretches go you can leave them as is you could put a board on top or you could put slats on like I'm going to do with this one use your imagination and come up with your own twist now when you're ready to screw in the top there won't be much room but you can still access the screws with a right angle adapter for your drill I use this DeWalt one all the time and I love it here I'm going to show you how I painted the two signs I've done so far I use stencils like this one Cinder it on the board and use painless tape on each end to secure it then I use a round brush this one is a milk paintbrush I lightly dip it in the paint wipe the brush on a paper towel to get most of the paint off and lightly dab the paint onto the stencil straight up and down this helps prevent bleed through make sure you have good coverage be careful not to dab on the outside of the stencil and when you're finished slowly peel the stencil Up and Away if you want you can get a thin brush and outline the letters I had a little bleed through but you can't really tell from a distance and I can live with it I put these rubber pads on the bottom of the feet to protect from ground contact if the boards are a little loose you can put a shim in to tighten them up so they don't rattle in the Wind if you decide to stain like I did be sure to seal it I use Hellman's polyurethane all over the stand you could paint it again the possibilities are endless the items I use are listed in the description as well as a cut list oh and the plant it's artificial my neighbors had no clue from that distance thanks for watching guys I always appreciate you stopping by take care and I'll catch you on the next video


No comments