wood shop projects “+10,000 Step By Step Plans ...even if you don't have a large workshop or expensive tools!“ Click Here 👈 ...
 wood shop projects
“+10,000 Step By Step Plans ...even if you don't have a large workshop or expensive tools!“ Click Here 👈
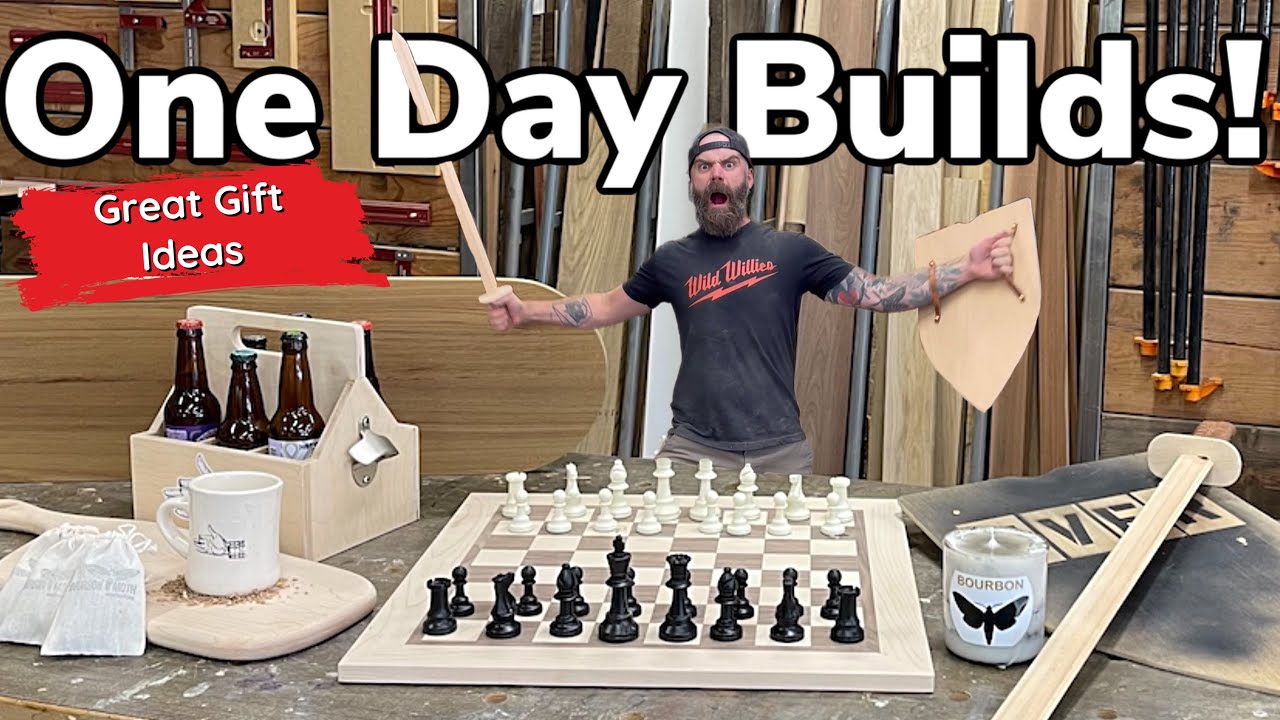
this video was sponsored by Noom hey they're cutting down trees which is really good news for us because we're Woodworkers and we can use those cut down trees to build cool stuff I know it's a little ways until Christmas but I thought I would do a video showing you guys some simple handmade gifts that are easy to make in the wood shop for kids and adults and I would do it a ways before Christmas so you would have plenty of time to procrastinate and then still do it at the last minute so that's what we're gonna do in this video I'm going to show you some easy gifts how to make them I think that's it let's do it [Music] if you have sophisticated friends and you want to make them something dang well a chessboard is a really cool gift because it's easy to make and it looks fancy as I'll get out I literally made this in half a day it's not hard and I'm going to show you how to make it right now so the first thing you're going to need is two contrasting Woods for my chess board I'm using black walnut and this hard maple next you're going to cut down strips of wood now whatever width you cut these strips to that's going to be the width of your individual squares you're going to need four of each color because there's eight rows in total on a chessboard so I cut down for the Maple and then because I was using thicker Walnut I cut that down and then I cut each one of those pieces in half so I could get more out of it then I took all my Walnut strips and my maple strips and I planed them all down until they were a uniform thickness eight strips in total then I glued all of my strips together making a nice pinstripe Motif just making sure there was enough glue in between each seams so that everything's sandwiched together and had proper squeeze out and would glue up in one solid chunk once my glue was dry I took my beautiful Maple and walnut Pinstripes out of clamps and next I ran the entire thing through my drum sander on both sides just to make it nice and smooth then I took it over to my table saw and using my Rockler Crosscut sled this is such an easy sled to use I'm really happy with this Rockler sled I trimmed down one side so I had a nice Square Edge then using that square Edge I set my table saw to the exact width as my individual strips which was two inches and I sliced my maple and walnut Pinstripes into eight individual strips alternating in color now I know I know chess boards aren't striped they are more of a checkered pattern well once you get all your strips cut down like this you turn every other strip around the other way and ooh it turns it into a chessboard pattern slash checkerboard pattern you could use this board to play either the prerogative is yours anyways you alternate every single piece and now instead of Stripes you have a beautiful checkered pattern of which to glue up into your chessboard and or checkerboard so after gluing this whole thing up and cutting it apart yeah we're gonna glue it back together but this time in the right pattern you want to try and get these glued up as even and flush as possible because this is going to be the finished size of your chessboard after my glue dried I pulled this out of clamps and it was back over to the drum sander to send it through on both sides and get the top very smooth and looking fresh then just to ensure that I had nice straight edges on all four sides I went back to the Rockler Crosscut sled and I just took a wisp off each side not really removing any Mass amounts of material just making sure that everything was nice and even this shouldn't affect the look of the overall checkerboard slash chessboard in any way shape or form now you might have noticed that the chessboard is pretty darn thin it's just under a quarter of an inch and that was by Design because of a wood movement we're going to lock this entire chessboard into a mitered border and if we did the chess board in full thickness would well that internal wood would want to move and expand and contract with seasonal wood movement and it could bust the seams on our mitered border so we purposely made the chess board really thin and then we glue it to a substrate of half inch Baltic birch plywood we just smeared some glue on the back of the chess board stuck it on top of an oversized piece of plywood and set a bunch of heavy things on top of it here's one thing that epoxy is really good at holding things down in a half an hour or so my glue was dry and as you can see the plywood is just oversized Beyond the Edge of our actual chessboard this is so we didn't have to get it perfect but then we did get it perfect by taking it over to the router table and using a bits and bits compression flush cut bit half inch shank and flushed everything up very nicely now it was time to put our border on I didn't show you this part but I glued up some bits of Walnut and maple together and I cut all the pieces for a nice mitered border just to give the whole thing a little more class and flare all I really do is make sure all my pieces fit properly smear Glue on all my parts and pieces and then throw the entire board in some clamps as long long as all your pieces are cut the right size you shouldn't need any fancy clamps here I just used four little bar clamps and you don't need a lot of pressure just enough to get a little squeeze out don't over tighten those clamps pretty soon my glue was all dry so I could pull the board out of clamps and then it was one more time over to the drum sander on both sides to get everything nice and flush across the top and then I finished it up with a little hand sanding on the front and on the back it's just a nice clean uniform surface you could do some other board game on the bottom if you really wanted to take the time but this is supposed to be a quick gift so one and done boom chessboard checkmate I just need to put finish on it [Music] you know what I think is a giant scam the candle industry every store you go into there's a candle and every candle smells like garbage like this one chai tea disgusting all right so I thought why don't we make our own candles something a little more unique something that men or women working in a wood shop would appreciate let me introduce you to the bourbon ma candle it's got a little something special in there to excite your senses and entice the aroma which is life I'm putting that on my ad campaign anyways here's how we made it no I'd never made a candle before so this entire thing was a little experimental so I went to the store and I just bought some fragrance free candles because I didn't want the nasty smells but I needed the wax and then using a big old hunting knife I started breaking the candles apart until I had a lot of bits and chunks of wax that I could melt down into my own special candle I did make sure to save the Wicks because probably gonna need those a little later on after we got all of our chunks of wax broken down from our fragrance free candles I pulled out a little butane camping stove and a pot and I started melting down the wax wax is crazy I mean it's hard but as soon as you heat it up it turns all liquidy weird science after we had it all melted down we added a little bit into some glass containers these are going to be our candle molds and then we could start adding in our own fragrances I started with a little gun powder because you know I like the smell of gunpowder I remember going shooting with my dad when I was a little kid and it always smelled so good another thing I love the smell of is worcestershire sauce with chester sauce with Cheshire or [ __ ] Cheshire anyways that brown sauce that you put on steaks and hamburgers it just makes me think of backyard barbecues so I thought it'd be a good smell we just started doing the candles in various layers we'd let a little wax Harden then add some more gunpowder once we got enough gunpowder in there we'd add a little bit more wax and kind of mix it up until we got a nice mixture of gunpowder and wax all in one unified candle pretty soon our candles were constructed layer upon layer of wax and black powder and I sprinkled a little more black powder on the top just for a added seasoning then it was time to go outside and enjoy my candle so I sat down in the garden thought maybe safety glasses would be a good idea and I lit my candle and you know at first it was really nice and peaceful it gave off a light Aroma of Worcestershire or Cheshire were the brown saw smell but then all of a sudden things got a little crazy not gonna say that gunpowder in a candle is a bad idea it just might not be something for your average candle consumer but to each his own I flipping love it [Music] if you ever find yourself in this situation you're walking around the grocery store you got a bunch of single random bottles of beer and you got no place to put them and you look ridiculous well that's why you make one of these this nice custom six pack beer holder and the cool thing about this is you can make it fill it up with all your favorite beers and then give it away as a gift and I'm gonna show you how to make it right now now this is a pretty easy one you need to start with a scrap piece of plywood I'm using half inch Baltic Birch then you take a beer pop the top and take a good long sip because it's nice to have a refreshment while you work after doing that you're going to use your bottles to figure out the measurements to get an actual size of your beer caddy I like to get an assortment of different sized bottles so that I know big or small whatever I get they're going to fit in my caddy you also need to account for a half inch middle divider that'll be the handle in the center of the caddy once you have that measurement all figured out you go over to the table saw and you cut down a strip of plywood to that width and you cut it to length now you got the base plate for our caddy then using that same strip because you want these pieces to be the same width you cut down two side pieces those will hook on either end of the base plate for our caddy now the side pieces need to look like an actual six pack carton thingama wants it so we're gonna cut them at a taper on the top and because both sides are going to be identical you can cut both of these at the same just be careful once you get those cut down so they're starting to look like the sides of a six-pack beer holder next we need to figure out the front and back of our little caddies so we cut those pieces and I also added these little tabs on my ends because I thought it looked better to have the tabs on there don't ask me why it was a split second decision next we need to figure out our internal divider handle so I cut a piece that was the right size and shape and I added these little tabs on the top these Tabs are going to sit over the edge of our little side pieces and it should fit in the center of your caddy nice and snug then on the base of that piece we need to divide it into three separate sections just like a real six pack beer holder so I marked out exactly where three separate sections would be and then we're gonna do quarter inch Baltic Birch for our dividers so using my quarter inch Baltic Birch I traced out how much material I needed to remove so that I could slot those dividers in the base of my internal handle thing and I cut out those slots over on the bandsaw now you should be able to insert your little quarter inch divider things right in the bottom of this Center handle piece and put everything back together and it almost is starting to look like a six pack beer holder the only thing missing is the handle in the top for this I just traced out where I wanted my handle to go and I used a forstner bit to remove the mass majority of all the material for a little oval shaped handle then I cleaned up the whole thing over on my oscillating spindle sander until it was looking nice and smooth then I took the time to pre-sand all of my pieces before for assembly because it's hard to sand once it's all together you should have two front pieces two side pieces a base plate two divider pieces and your internal handle piece that's slotted with an oval handle in the top then all you really got to do is add a little glue to all your seams and I just tack it together with an 18 gauge brad nailer so a little glue glue glue tack tack tack Zip Zap Zoop Jason's back that's what I would say if that was a wrap which it wasn't I was just trying to give instructions on how to put this beer caddy together and boom nice custom wood beer caddy after it's all assembled I just do a little finish sanding on the outside making sure all my seams are even and smooth I add a little bottle opener because you know you got to be able to open the beer and of course I added a nice little sticker for Branding but also to remind people what happens if you drink and operate heavy equipment you could lose a finger stickers available on my website see this is nice because you can get your whole variety of favorite beers take it over to a friend's house and then just have a cold one and enjoy it with your hey thanks man dude you're on the clock get back to work anyways you can just enjoy it with your friends and leave it there as a cool gift [Music] hey this video is sponsored by Noom you're probably wondering what the heck's a Noom well don't worry that's what I'm here for to tell you now you may have noticed in the last few months I've started looking a little Slimmer that's because I've lost some weight I've been trying I got a little Hefty and I wanted to do something about it and like you you know maybe you've tried diets before or exercise programs and they always work for a little bit but then you get burnt out you get tired of it and you end up falling off and going right back to your old habits the cool thing about Noom is they approach weight loss in a completely different way psychologically helping you figure out your habits your good habits your bad habits and the best way for you to lose weight and get into a healthy routine so the cool thing about Noom is you download the app and then it's got everything organized to help you stay on track and reach your goals every day they're going to give you a new course that you can go through and they're all like a minute to three minutes so it doesn't take very much time and they teach you cool things that I did not know before like did you know that people that weigh in every day are statistically more likely to lose weight than people that don't track their weight which is nice because you can track your weight right down here you can log your meals and accounts your calories for you at the top it tells you what range you should be in if you're trying to lose weight healthily they also teach you cool things about eating healthier like caloric density I didn't know that kind of thing but now I'm thinking about that because of the teachings from Noom the other thing I love about Noom is that it's not just an app you really become part of a new community so if I have a question about a certain food or I'm just feeling discouraged that day because I ate too much there's a live chat where I can chat with real life experts and they'll give me the encouragement and information I need to stay on track with my goals so if you want to try new which I highly recommend just go to noom.com Bourbon moth take a quick 30 second quiz and get started today or you can click the link in the video description just check it out give it a try I know for me it has helped a ton stay focused stay on track and accomplish my goals and I will say I am looking much better [Music] ready your breakfast and eat hearty for Tonight We Dine hell so as a dad I've gotten used to making a lot of swords in my days and at first I just started picking up sticks and saying here son there's a sword but the more my son grows and knows what's fake and what's not the more he wants realistic Weaponry so that's why I'm going to show you how to make the sweet sword and shield let's do this thing now after a lot of Sword making and trial and error I found that the best material to make sword blades is trim molding because it's got all this nice profile look to it which you can form to look like an exact replica of an actual sword all you got to do is thin it down a little bit so putting two pieces together so you can run it through the planer you run it through the planer until you see it starts to get nice and thin towards the tip once you do that to one side you flip it over and you do the exact same thing to the other side then you can sandwich these two pieces together and you can see it's starting to look like a sword on either side next I I like to run it through the planer on the rounded side just to flatten the one end a little bit so I do that to one side then I take my other piece I run that through the planer until you have two identical pieces now sandwiched together it's really starting to look like a sword blade all you got to do at that point is glue your two pieces together so that you have one piece that's the exact same on both sides this does require a lot of clamps but it's worth it it's for your kid while we wait for the glue on our sword blade to dry we'll start working on the shield now for the shield I'm just going to use a scrap piece a quarter inch oak veneered plywood I find the center and I hook a clamp on that's kind of going to be a pivot point then I'm going to take a scrap piece of wood and bend it at an arc to try and Trace out a shield like shape this might take a little trial and error using different pieces of scrap wood until you get the right Arc in the right shape I mean there's no wrong way to do this just keep bending piece until it looks like a shield once you have a shield shape you go over to the bandsaw and you cut out that shape and then I just clean it up over on the oscillating belt sander and I also like to add a little detail to the top so I just kind of sand it out a little divot until boom we got a shield next I wanted to customize this shield for my son by putting his name on it so I just got some of these cheap paper stencils that you can pretty much get at any big box store laid them out on top of the shield and I sprayed the whole shield with a little black spray paint kind of in an uniformed way you know to give it that aged look like he just came back from some great Conquest over the sea in a distant land anyways now it says Iver on the front of his shield while I wait for the paint on the shield to dry my sword blade was dry and ready to be taken out of clamps now we've got a sword blade but it doesn't have any shape to it so I took it over to my miter saw and very carefully so that we don't do anything crazy I added a point to one end you could do this on the bandsaw too and it would probably be a little safer but this got the job done then using the oscillating belt sander I tapered the end so that it looked like the point of a sword next you have to slim down the hilt of the sword just a little bit not a lot it just has to be thinner than the actual blade so the blade becomes a stop for the guard and speaking of the Guard that's what we're going to do next I just get something round that I can use to trace out and well just kind of get a round guard like shape traced onto a piece of scrap quarter inch ply then after cutting most of that shape out I go over to the oscillating belt sander and I refine the shape just sanding down to my pre-traced line until we have a oval like guard shape then I use the Chisel to clean up where I stopped thinning the hilt over on the Belt Sander so that we have a nice hard stop and this will allow us to slide our guard on and it should stop when it hits the blade next we need to cut a slot in our guard so that it can slide over the handle of our sword for this I I just used a little forstner bit that was about the same size as the handle of our sort next we just start to slide it onto that handle cleaning it up with the Chisel as we need until we get a nice friction fit right up to the base of the sword blade and it's starting to really come together and look like a sword but as you'll probably guess it's not very comfortable to hold on to enter some leather strapping that I had lying around I just cut one end at a nice little wedge to get it started I staple it in place with a half inch 18 gauge staple and then I just keep wrapping that leather all the way around the handle working my way down to the base and once I get down to the base I staple that part in place and then run some Staples all the way up the handle now these are half inch they don't go all the way through the sword they get stuck in there so don't worry you're not going to get poked and after doing one side I do the same thing to the other side and this gives it a nice kind of riveted look at least that's what I tell my son next we just have to add some leather straps to the back of the shield so that he can hang it on his arm when he goes into battle with the neighbor kids I just drill some holes through the shield and then I hook it on with these little brass screws and nuts you could use acorn nuts but I didn't have any so I just used regular nuts which means he'll probably get poked with those screws at some time and it'll be all my fault but I just made you a sword in the shield what more do you want obviously I had to test it out and sure enough it works [Music] it was on the back side of my head anyways that's how you make a sword don't poke your eye out don't kill yourself don't Slaughter the neighbors all right next [Music] one of the most insincere and unthoughtful Gifts you could ever make for somebody is a free-form cutting board cut from a single piece of wood but sometimes they're in a bind and we need a quick gift so I thought I'd show you how to make one hmm your wife will love it all right this one's insanely easy so pay attention you're gonna need a board a single board that works good for a cutting board like Maple or walnut or cherry something of that sort now I always like to start with my handle which is going to be round and I'm going to drill a hole through the center so I found this little shot glass from a bottle of bourbon and I traced out roughly where my handles gonna be beautiful next you're just going to take a pencil and draw a shape there's no wrong shapes this is a free form cutting board it doesn't have to be pretty it just has to be art that's tell the recipient of the gift once you have a shape that looks good to you you go over the bandsaw and you cut out that shape remembering that staying on your line isn't super important it's a free form cutting board the lines are more of a suggestion after you cut it on the bandsaw I like to clean it up over on the oscillating belt sander which is being used a lot in this handmade gift video after we get all the edges cleaned up nice and they're looking smooth I take a forstner bit that looks like a good size to drill out a hole in my handle I tap it in with a hammer to get it started and then using a smaller drill bit I drill all the way through the cutting board this will allow us to drill in from both sides with the forstner bit making sure it's lined up and we're not going to get any blowout on one side I mean we still want the cutting board to look nice after we drill the hole I take it over to the drum sander and I send it through on both sides to get it nice and smooth and then I pull out a quarter inch round over bit and I start rounding over all of the edges to make it look like I put more effort into this than I actually did I also rounded over the inside of the hole I drilled out to make it feel nice on your finger after everything is Thoroughly rounded over you sand and I hate the sanding part but in no time look at that a free form cutting board made in about 10 minutes just tell the person who's getting it it took all day well I try and do something nice for my wife make her a 10 minute cutting board from the sincerity of my own heart and what happens she gives it back to me and now I'm out here eating all by myself [Music] as Woodworkers what's our number one pet peeve people who only pop the popcorn halfway through and you got a bunch of unpopped kernels in there it's annoying but what's our number two pet peeve yeah people putting drinks on top of our brand new freshly made furniture without a coaster but coasters can be ugly coasters can be hard to find some houses don't even have coasters that's why this is a great gift for your friends family members and clients and that is coaster in a bag regular coasters are inherently flawed because once you set the drink down it can sweat and still roll onto your piece of furniture introducing coaster in a bag you simply pour out the contents of the bag and set your drink on them not only does it protect your table but the contents will soak up any unwanted moisture do you have annoying employees who just set their drinks on your cast iron work surfaces will coaster in a bag is here to help you save the day and your equipment yo Jason I need one of those coasters in a bag thanks I'm telling you guys coaster in a bag is a great gift and it's easy to make but if you don't want to hassle with making it yourself these are actually going to be available for sale on our website 12.99 for one coaster in a bag or 26.50 for two there's a link in the video description get yours today only available while supplies last [Music] another great gift for that special someone in your life is a custom wooden bath tray this is a little tray that sits across your bathtub and holds all your fancy accoutrements things that really enhance your bath time ritual make it something special I think it's something to remember I'm going to show you how to make this one right now now everybody's bathtub is different so the first thing you want to do is measure your bathtub or the bathtub of the person who will be receiving this gift once you get the measurements right next you got to select the wood now for this tray I'm using teak because teak does great with moisture it's got a very high oil content so people actually use it to build furniture for inside of showers because apparently that's a thing now furniture and showers anyways with your measurements in hand you need to cut your boards down to the right length next you need to join one side of both boards so you have a straight edge that will allow you to run it through the table saw and cut it down to the correct width and the correct width is whatever the heck you want it to be now one thing to note about gluing teak to itself is that the oil content is so high that before you glue two boards together you really need to wipe down that glue joint with a little acetone this will remove any surface oil that's sitting on the wood and will allow that glue to penetrate in and actually hold the boards together so after doing that I clamped the boards up and waited for the glue to dry once the glue was dry took it out of clamps and I sent it through the planer on both sides to make sure the top and bottom was nice and smooth then I went over to the chop saw and I just cut a tiny little bit off each end to make sure that both sides were perfectly Square next you want to take your board set it on your workbench and grab a big bucket full of junk and set it on top I mean I guess it doesn't have to be a bucket just anything big and round the bucket just happened to be the exact right size to get the profile we wanted which was this nice round profile on either end so I used the bucket to trace out that profile on both ends next we need to attach some feet these are less feet and more guards these are what's going to keep the tray from sliding to one side or the other and falling into the bathtub and just like our other glue scene before we glue these feet onto the bottom we wiped down each seam with some acetone to get rid of that surface oil spread on some tight Bond three because it's good for moisture and we clamped the entire thing together then we just had to wait for our glue to dry ooh our glue's dry look at that with our feet glued on now it was time to cut that rounded profile shape so I went over to the bandsaw and I cut off most of the material staying just outside of my pencil line once I had enough material removed it was time to use the router but for this we needed a router template and unfortunately I thought the bucket would be a little awkward to use as a template so I'm going to use the bucket to make a template so I see a glued a piece of quarter inch plywood onto the bottom of the bucket and using a quarter inch flush trim bit from bits and bits I just made a template real quick out of that quarter inch plywood after that was cut out I just pried it off the bottom of the bucket and used some double-sided tape to stick it to the top of my teak bathtub tray Shelf thing then I went over to the router table and again using this flush cut compression bit from bits and bits I flush trimmed both the ends to match my template and look at that we have this nice rounded looking bathroom tray Shelf thing all that was left to do was to clean it up a little bit with some hand sanding and this thing would be ready to install and by install I mean ready to set on top of the bathtub I did wipe the whole thing down with a little more acetone just to get rid of all the dust and get rid of any surface oil that might be sitting on the outside of the teak and I was ready to take a bath man this is great I got my wine here I got a good book I can dive into the only thing I need is a nice scented cane little just to make the move Jason are you crazy hey man all right there's still one gift that I haven't mentioned yet and I saved the best for last if you're too lazy and can't find the motivation within yourself to get up off the couch and go make something for your significant other well that's okay you can just get on our website we got a whole bunch of new merchandise t-shirts hats coffee mugs that sort of thing there's a link in the video description just do that or go in the wood shop and build something hopefully you got some good ideas from this video there's also links to all the products and tools we used linked to our patreon page down there if you're not signed up for patreon you should be because you get a whole bunch of behind the scenes footage backstage pass perks Live question and answer every week discount codes all sorts of things so until next time go make a gift and use a coaster ...


No comments