wood turning classes near me “+10,000 Step By Step Plans ...even if you don't have a large workshop or expensive tools!“ Click ...
 wood turning classes near me
“+10,000 Step By Step Plans ...even if you don't have a large workshop or expensive tools!“ Click Here 👈
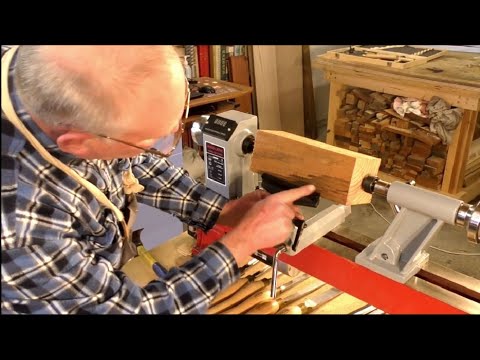
hello i'm roger webb and welcome to my workshop today's video i'm going to introduce you into the very beginning of woodturning with a lathe this is um a fairly standard basic um bench lathe now it's made up of a headstock and down here is the malta and it's a belt drive there are three uh different pulleys in here which i'll take you around the back and show you in a minute we have a variable speed control here um so headstock and we have this is the drive spur here there's several different mechanisms of holding and driving turn it the uh the workpiece and i'll show you those in a minute this is the tail stock so this is the support for the for the other end and this is the tool rest which is adjustable up down round and round and so this is what you rest a chisel i just get a pretty standard chisel press the chisel on and you move along the tool rest here present it to the the uh work piece to machine some of the wood away um if you notice the shape of this it's a comfortable sort of shape to put your finger in here like this and hold it okay it sort of gives you a register to put your hand in here never ever put it up on here you're gonna start losing figures so that's how to to use that so we're at the back of the lathe now and inside here so we're just slacking this off slacken this off put it up there at the way so inside here we have the drive belt which goes down to the motor down there and there's a uh tightening mechanism down here that you can slacken this to to be able to change the the speeds of the belt um so you got three speeds low medium and high it's on low at the moment because we're going to put a fair sized lump of wood in there and uh so we want it spinning relatively slowly um so so so we have low medium and high the slower speed is 650 rpm and the higher speed is 3800 rpm now when you go into the back of this be very careful of this little serrated or looks like a little bit of a gear wheel here this is the pickup for the dros or the the digital outputs on the little window right here that you can break this very easily okay so it's what they call a hall effect uh pickup so i knew the electronic pack is in here so just be careful of that some layers have it some do not i prefer to have a lathe that tells you what the rpm is so you know exactly what the lathe is doing and uh i i don't believe in not knowing what the rpm is what i have here is a selection of some of the chisels that i use on both of my uh lays um this is a for this lathe quite a large gauge okay you can see the shape of it there that's about uh oh let me see probably um again now three quarters of an inch i think just to give you um it could be regarded as a roughing tool now for the large lathe this is a roughing tool as you can see it's a quite a large tool for removing a large amount of material this is an in intermediate gauge i use this one a lot on this lathe um and this is a small so this is a detailed gauge it's a very small one what do we got here um all right this is a finishing tool this is a very small commonly known as a scraper and this is a another detailing detailing [Music] um this one is a parting off tool you actually use it edgeways okay to pat bits of material off so this one is a very special tool [Music] this is called a skew now i would not advise first-time users to to use this one uh i'll show you a couple of things that you can start to use it with but you've got to be very careful you should be um you should uh be sort of fairly proficient of what you or have some knowledge of the lathe and experience before you start using this really um get into trouble with this one pretty pretty quick um let's see what else we got here um it's a spindle gauge pretty standard size spindle gauge and this is my favorite tool notes a very very long handle this is really for the bigger lathe but uh i use it on this one as well and this is a bowl gauge now i use a bowl gauge for most things now 50 years ago or more when my grandfather started teaching me how to use the lathe he said to me boy you use whatever tool you have in your arsenal to get the job done now it's not really until sort of later life i suppose you and i understood really what he meant and what he meant was that well sometimes you use a tool that's not strictly the right tool or the textbook tool to be using to do a particular job on the lathe but um you sort of get used to using the tools um and the ability of those tools yourself and only you can determine what is the right tool to use do a particular job yourself um so like i say i use a bowl gauge for most turn-in jobs i feel very comfortable using this tool and i also sometimes i have been known to use a passing off tool to hollow out a bowl if it's a very hard piece of wood because there's no flex in this and it's a small cutting area so you you know you don't tend to dig in anyway that i'm talking about things now that uh you'll learn yourself later on down the track okay now we're going to talk about work holding now what that simply means is um the tools then that you you have in the lathe that holds on to the material to so it's um tool holding or work hold in now this particular one these are what we're going to use this is a spur drive so it's a little point here and there's like teeth here that dig into the wood that'll hold it and drive it so we have this on the driving end here and then this one has got a bearing and a spike or a point and that holds the other end of the material um another method is a faceplate that screws onto here i can't put it on there never and you can actually screw it with wood screws onto into your material that's probably better for a much heavier piece of wood uh or larger diameter piece of wood you you'd use this rather than this method another method is another method is your scroll chuck with four jaws now this particular one is for holding like a rim of a bowl but you can take these segments off and there's different segments that you can put on to to hold it different shapes of wood whether it's an internal tenon such as this internal tenon so these go inside the wood and splay out and hang onto it and drive it is these general purpose um segments that uh hold onto the piece of wood um but there's also another method and that is uh i think it's called a wormwood screw it's like a giant screw now this gets held inside in the jaws in there like that and you do it up so you've got to drill a hole in the piece of wood and then screw the piece of wood onto here that holds it pretty firm i i only use that method occasionally so there's several different ways of holding or work holding on on a lathe um when you purchase your lathe uh whoever you purchase it's not worth me trying to describe to you to you who to go and buy your lathe from because i am speaking to over you know 150 different countries so you know it's up to you to go and do your own research and find a stockist that that can sell you the product a reasonable product product like this and sell you the chisels and the the chucks and the chucks should come in a in a case similar to this if they they're good uh well made you know um you can have a dig around on the internet and find out what well-made means reliable equipment [Music] obviously uh know if you buy cheap off ebay well i don't know how long it's gonna last it could last just five minutes um i would go to a reputable company or a reputable stockist uh who supplies this type of tooling um for anything that you buy now before we go any further um we need to have a word about shop safety now these aren't just ordinary glasses these are acrylic they have a lens uh for distance at the top and the lens at the bottom for a meter in um so these are the standard type of safety glasses i can't wear them because they don't have the right lenses for me so and this is why i have larger type lenses too to protect my eyes certainly when using a wood lathe you must wear a face shield okay um because these pieces of wood you'll if you look back in some of my videos you'll see that uh even i have had pieces of wood it's very unpredictable wood uh there could be a knot somewhere in there when you're trying to machine it that your tool catches it'll pull it straight out of the chuckle out of the centers and sometimes it can come at you so this is a must you must wear the right gear and of course find dust particles you must wear a mask so always keep safety in mind whatever you do okay especially uh you know in workshop conditions where you're using it as a hobby or as a profession safety first okay spur drive so you can see it's got a got a point and some teeth faced in a certain direction so the lathe drives in that direction so it actually makes this bite in deeper so and you notice there's a taper here so that goes that's called a morse taper that goes into a taper inside the shaft in there and it holds it so it holds it really tight so okay so what we're going to do now is find the center of this material and to do that we just simply just get a straight edge and go from corner to corner [Music] like so turn it corner to corner same the other end [Music] and just simply you get a hammer put the point of that on there and go [Music] give it a couple of taps there then all we do now is put that into the shaft and bring the tail stock up there we go nice and tight so then you set the tool rest about a quarter of an inch which is about oh five or six mil out from the piece of wood i always turn your piece of wood around so it uh you know it's not gonna hit the tool rest and this should be about [Music] just sight it about quarter of an inch down below the center height of the of the centers of the the lathe then um i'll show you why that is so when you get your your uh chisel when you present the chisel to the material the cutting surface there is about on center height it ends up on being about center height for the the actual lathe that's the ideal situation so now what we're going to do is we're going to start roughing this out and we're going to make a round cylinder and then we're going to use some of the other tools here and i'll show you what sort of shapes that they can make or what you know their job would be so the first thing we're going to do is position this tool rest at this end so we can start on this end and work our way up towards the headstock and put our face field on our mask and the first tool we're going to use the intermediate gouge uh which could be regarded with this size lathe as a roughing tool so but let me here we go i'm going to set it on the low setting will speed up a little bit as we go [Music] so here we go so you can see what i'm doing here i'm starting on this edge and then going in and working my way out this is i find is the best way of starting off anyway and roughing it down so here we go i'll speed it up a little bit more because i think it'll take a bit more speed yes 800 rpm there do [Music] [Music] okay so we'll just move the tool rest up and we will continue what i'm doing now i've just taken the tips off and i'm just moving this in and off we go again [Music] you can actually plunge with this as well plunging let's have a look uh just a little bit more and we'll should have a nice round cylinder [Music] okay i'm going to switch now to uh the the gauge now this is the first way i would suggest that you um operate with a gauge very very gently [Music] it's a fairly flat tool so it's going to give you a flat surface present the gauge to the material so as you can see that gives a very very nice smooth surface finish with the gouge but be very careful using it so now we're going to move the alter that a little bit move the tool rest up here a little and we will continue now with this half of the cylinder and then we'll start using some of the other tools so here we go [Music] i'm just going to speed the lathe up a little bit to about 1200 yeah that's about 1200 i can tell by the sound of the lathe and the sound of the the way that it's cut in uh whether i can speed it up a little bit that'll come to you in you know good practice [Applause] you can see that the shavings are coming off very much smaller because it's turning faster [Applause] you can see it's a little bit uneven so then you get your skew being very careful with the skew so and there we have very nice clean ish cylinder to work with now what i'm going to do is i'm just going to move this up slightly i think the camera is fine there where it is and this is uh uneven here at the moment so what i'm going to do is now you can use several different tools you can either use spindle gauge such as this to to machine this but i'm going to show you something with the pattern off tool because the padding off tool can be used for many different jobs and this is one of them i'll show you this now [Music] so you get the padding off tool and you you present it with a high angle like this gently and that's another way to face something off just roughly so now what i'm going to do is i'm going to show you with some of the individual tools now some of the different types of cuts and we're going to make a shaped piece on here it could be you know corner of a bed it could be a leg of a chair it could be anything you want it to be so the first tool that we're going to use now is a standard spindle gauge okay so we're going to use about 1200 rpm might take it a little further actually let's have a little look [Applause] [Music] it's 1300 lathe is very stable there's nothing out of balance so that's good to go so here we are so you just present the cutting edge and turn it clockwise the season nice nice round groove um we could try this is a no this is a detailing gouge so we're going to try a small one little detailed round let me see okay so this is a detailed v so we're gonna put a little couple little couple little grooves here okay and maybe [Music] there as well and let's see we're going to go revert back to the standard spindle gauge again and just round this just follow it down a little bit of a round so you've taken most of the material away now so then you come along with your skew and round it off it gives a nice rounded edge okay so what we will do now is [Music] take our intermediate take some material out here yeah let me see here's my bowl gauge i think i and this is my favorite tool you can do some fine detail work with this as well see even though it's a big tool you can do some really fine detail work with it blender cut there okay let's stop that and have a look so you can see now that um this material actually isn't the best for you know sort of a finish but um it's uh you know it's it's cheap and i had it on handier to use so you can see now that we you can get some fine detail um in wood you know and you can probably recognize some of the the markings that we're making now that uh you know professionals use so what we're gonna do now we're gonna go a little bit more dramatic down this end okay bowl gauge now [Music] speed it up a little further so give us some more dramatic material movement now [Music] [Music] so so notice i rolled it over i'm using the side edge now as a as a cutting edge as well as the point so you push in so you can notice a bit of a shape coming now it looks a bit like a bed [Music] knob that's quite a pleasing shape there so they were coming with the skew being very careful i don't take the point right down in there okay so we'll move further down now and we'll come to this intermediate gauge let me get our detailer you can find him where is he here he is [Music] so actually i flicked the bit off the side wall there but it doesn't matter i just hold it down and until we came good again detail gauge finish that off i will stop it and move further down so you can see how the piece is building now [Music] that's okay okay so that was an introduction to wood turning um i say again it's not necessary for you to have a large professional type lathe uh you know spend four or five thousand on it um you can get yourself a reason you know a a good bench lathe fairly reasonable and you should be able to buy the chisels from the same supplier that supplies you the lathe as well as um chucks um and anything that you might need i do advise you to get a if you get the bench slate get one with a get one with the dro which is digital readout you want to know exactly how fast your lathe is going you want a variable speed and you want um at least three different speeds that you can choose from so you can you know sort of really have a um a variety and you can do a lot more work with them so i hope you've enjoyed this video today this is the start of uh a series that i intend uh to be doing uh starting right from the very start basic wood turning um and we will progress on through to um doing some quite difficult jobs would turn in um bowls and vases and some old pieces of wood so if you've liked this video please press like and subscribe to my channel and forward it on to your friends because that's how the the channel grows so don't forget i have two channels now you can get to my second channel uh there's a link in the banner at the top of my home page on youtube our youtube homepage uh also there's a link down on the your right hand side down there and below that is the link to con o'neill music as well some of the music i do use in my videos now uh the there you will find on both my channels you will find uh videos on woodturning cnc routine uh shop jobs that i do around here lasers uh milling and of course the programs that operate the cnc machines so thank you for dropping in and um i hope to see you again fairly soon so it's bye for now [Music] you ...


No comments