wood tools near me “+10,000 Step By Step Plans ...even if you don't have a large workshop or expensive tools!“ Yes, Get Access ...
 wood tools near me
“+10,000 Step By Step Plans ...even if you don't have a large workshop or expensive tools!“ Yes, Get Access To 12,000 Shed Plans! 👈
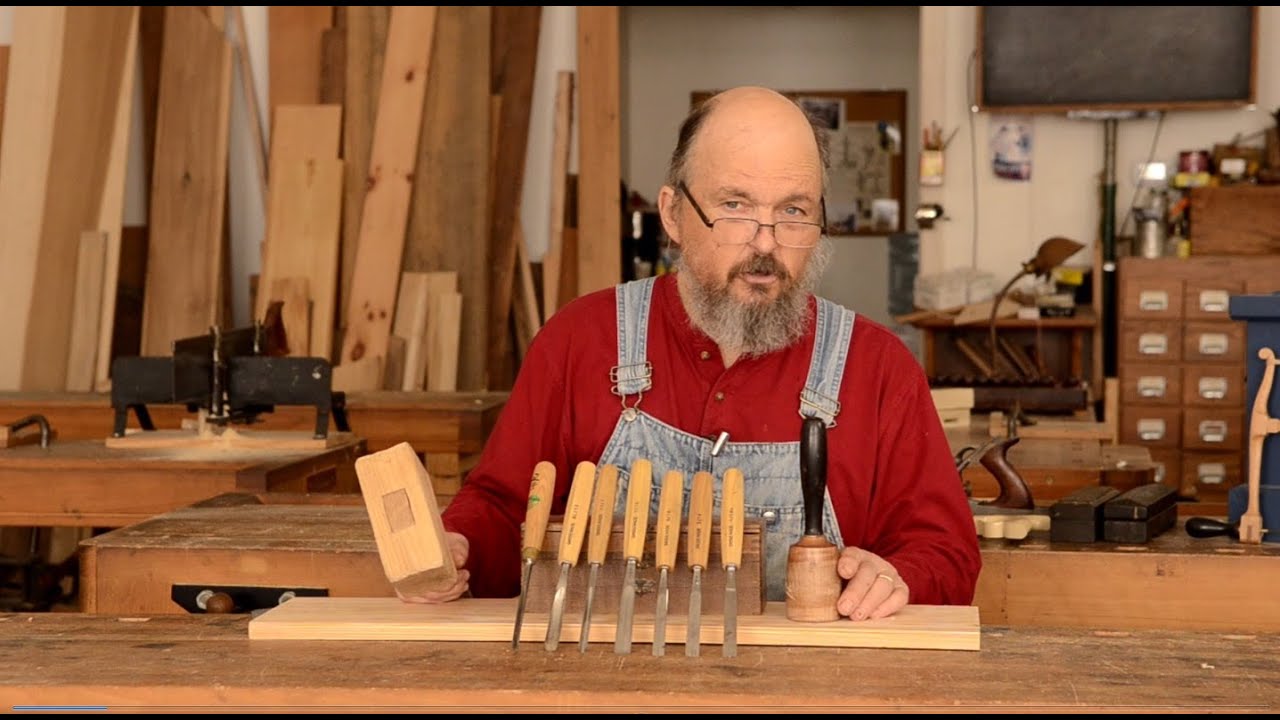
[Music] thanks for watching wood and shop my name is Bill Anderson I'm here at the wood right school Roy and Hills the wood right school in Pittsboro North Carolina I'm here with Josh Farnsworth and I'm going to talk to you a little bit about carving tools that you can use to work on your traditional furniture with specifically we're going to look at some carving gouges here and carving mallets and I'll just talk to you a little bit about some basic information about these first of all this is a carvers mallet you can see that it's round not very big sometimes they're very much smaller than this sometimes they're made out of brass or something like that but they're very easy for striking and changing the angle of the chisel as you work around so quite useful in that respect the other type of choose of mouth you see in the shop is a joiners mallet square faced slight angle here really meant for chopping or heavy duty work a little bit cumbersome for doing the work of carving an intricate pattern on a piece of work so typically you don't use a mallet like this for carving I've got a raid here a series of chisels and these are all out Cannell chisels you can see that the bevel is on the bottom side of each one like that in other words outside the curve of the chisel so those are out Channel the other style of chisel is called in cattle for the bevels on the inside those particular tribe the chisels are used more not so much for carving as for scribing coping and things like that in frame and panel and sash work but these are tools that are a range of tools that are used for your typical carving needs and I've arranged these in increasing levels of sweep so the sweep is the curvature of the chisel right to left like that the curvature so chisels that have no sleep or typically number one and then as you work your way up to number eleven just those with a number eleven see if you have a u-shaped sweep so they vary from one through eleven in a degree of sweep and in addition how wide the chisel is so you can find chisels that are narrow and wide and it's indicated here on the side of the chisel and this for this particular brand they've indicated this sweep which is number one a slash and then the width of the chisel in this case 14 millimeters and usually the width is expressed in millimeters so a little bit more than a half an inch wide and all of these I've chosen all these to be about the same width this one is sixteen millimeters it's 60 millimeters from point to point the actual functional width of the chisel rather than the width of the curve and then this one is a number seven sweep so there actually are two systems of numbering there's an English system and there's a European system the English system includes not only a straight chisel but before the first curved sweep they have a skewed chisel and that's the number two in the English system and then the first sweep is the number three up to eleven European system they don't have the skewed chisel in that in that nomenclature so the first sweep is the number two so you can see that depending on who made your chisel the numbering system especially in the lower numbers will be a little bit different and you need to be aware of that typically if you're going to do a carving project the safest way is to get an impression stamped in a piece of wood at the end of your chisel from the person who's going to teach you or the book you're going to learn from or whatever and take those impressions to the tool store and look for a chisel that Matt that way you'll be sure to get the suite that you actually want to sweep in the width that you actually want and that's important I have two other chisels here which are quite useful and a little bit different this one's a bent gouge see it's still an out panel gouge but the shaft here is bent and this this allows you to get a little more steeper start on a piece of work where you may have some restriction in the back but you can come in at a steeper angle and work that out so they have chisels that are bent in this direction and in the other direction as well those would be definitely be specialty chisels if you're looking for a set of chisels initially these straight chisels are the most common and most commonly used straight chisels the last one I want to show you is the V gouge and you can see that this chisel here is in the shape of a V and V gouges are used to block out the outer perimeter or internal design elements of a carving in order to get the general shape and depth if you want and then you'll come back with other chisels to carve in the curves for example if you're doing a shell or something like that you might use a V couch to outline the various lobes of the shell but a straight or slightly curved chisel to carve the actual curve of each lobe so different chisels for different purposes the gouge is quite common you need something like that in the basic set some small V gouge this one is a in this particular numbering system the gouges are numbered 41 they don't really have a sweep per se but they do have a width so this is six millimeters wide in other it's about a quarter of an inch wide but it's the number forty one chills and that's just a number that they have in their system there's nothing specific about it but other V geologists maybe wider or narrower than this this particular one has 60 degree curve 60 degree angle here the V is 60 degrees their RVs that are 30 degrees and 45 degrees so you need to be aware of the fact that if you get a V College you probably want one is steep like this these are well suited for outlining a project the other V gouges have more specialized purposes so just need to be aware of the fact that there are different angles to the V gouges and when you're using a carving tool let me just do a little a little cut right here just to give an idea of of how how you would use a carbon chisel you can either do all your cutting by hand which has a lot of advantages and you see that I'm used my hands in opposition to each other one hand my dominant hand is pushing the chisel through the work because just to carve like this nothing would stop me from slipping and going making a cut go too far so I use my other hand my left hand to come in and push back so one hand is pushing forward one hand is pushing back I call that my yin and yang hold so as I cut down not only my pushing forward but I'm pulling back so that the cut is limited like so the other thing is these bevels on these gouges and you can see this is a fairly long bevel they're often slightly curved they're not like a mortise chisel bevel or a bench chisel bevel that are flat and straight these have a slight curve to them so that you can come into work and immediately come out of the work so often in carving you're working in short areas and you want to be able to come in and come out so the bevel is not necessarily ground straight across it's ground with a slight curve like this on the other hand the chisels are in fact ground straight across this way they're not curved in this direction all this straight across here so if you have two sharp corners here that's important but curved this way just slightly the other thing is I have this yin and yang hold like that so I'm holding this but when I start to wiggle when I start to carve I'm actually wiggling my chisel just a little bit this helps me to advance the cut and keep a lot of control over what's going on and then as I come out I can wiggle right out and I get a nice nice smooth cut that way rather than just trying to push in and and push back out again now you'll use both these cuts this sort of cut and the wiggling cut depending if I'm using this big ouch to outline a profile and I want to make a complex curve and I'll have a line fault them falling here I'm a wiggle this to help me go at various points along this curve I'm going with the grain across the grain with the grain across the grain and so wiggling like this helps to make the cut a little bit easier so I can get a complex shape without having tear out when I go through a curve or something like that so using the tool back and forth like that will help to with me like this will help to give you a good cut of course the other way to use the chisel the gouge is to tap and often rather than holding the mallet down here low like that and striking like this a very heavy operation people often will hold it up here on the head and take light paths this allow you to steer the chisel and not be too aggressive on the advancement of the cut so I hope that explains some of the some of the basics of selecting a chisel and width and curve of chisel and basics of doing ulna [Music] ...
“+10,000 Step By Step Plans ...even if you don't have a large workshop or expensive tools!“ Download Today! 👈


No comments