work table plans “+10,000 Step By Step Plans ...even if you don't have a large workshop or expensive tools!“ Yes, Get Access To...
 work table plans
“+10,000 Step By Step Plans ...even if you don't have a large workshop or expensive tools!“ Yes, Get Access To 12,000 shed Plans! 👈
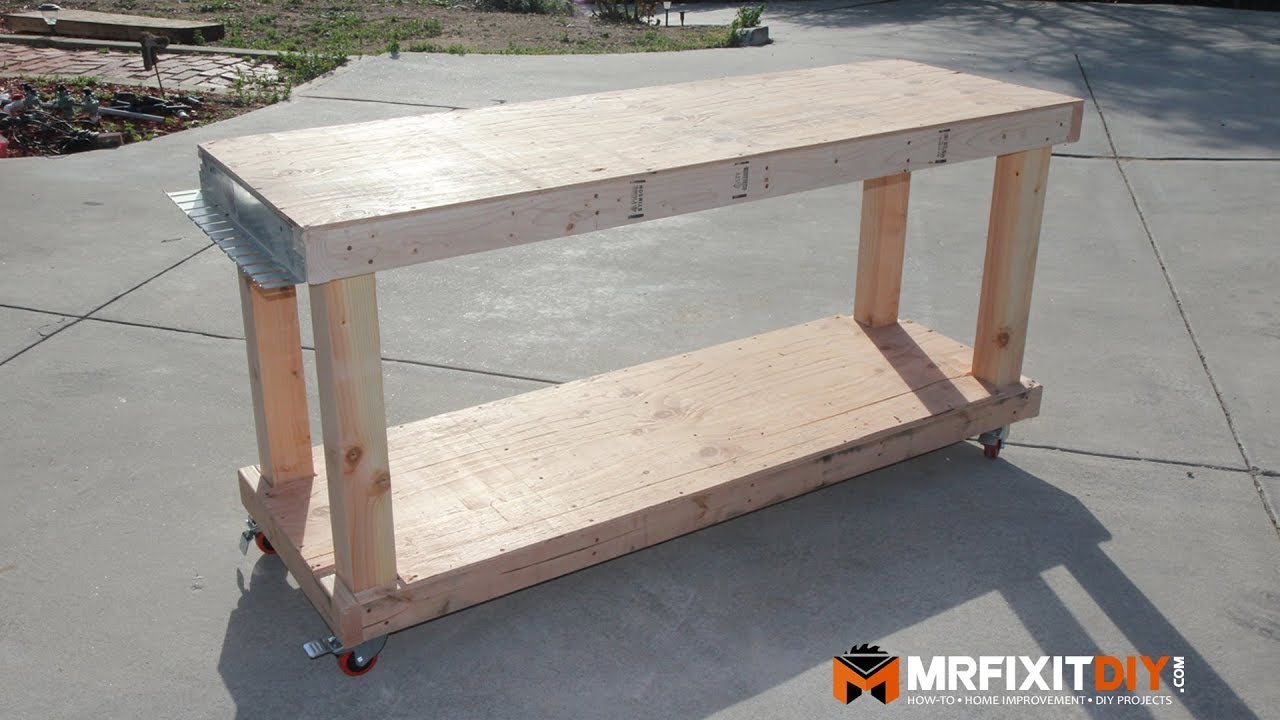
what's up guys my name is Aaron Massey and today I'm going to show you how to build a very basic workbench for your shop I call this bench the poor man's workbench because it can be made for about 75 dollars out of a single sheet of plywood at some two by fours and four by fours that you could pick up at any local hardware store this first bench that I built has been with me for like four years now and I built it when I was living in a rental house that didn't have much of a shop so I wanted something that I could easily stash away and then wheel out and work in the driveway when I needed to I decided I'm going to make a second one so that I had a little bit larger outfeed for my table saw and because I wanted another workbench that I could wheel in and out of the shop if I needed to the first thing we're going to do is take a look at the design so you get an idea of what exactly we're gonna be building today this bench is made out of four by fours and two by fours in a single sheet of three-eighths plywood you could just use two by fours and double them up for the legs but since I wheel this thing around a lot and I beat it up quite a bit I like the stability of the four by fours it's up to you however you want to do it the overall dimensions of the bench are 72 inches long by 24 inches wide by 36 inches high you can make a workbench whatever size you want to fit your space based on this design it just depends on how much material you want to buy what size you need and how big your budget is I'm just going to show you how to build this basic one which is a matching one to the one i previously built so let's get started on building it first thing that I'm gonna do is we're gonna cut the four by fours some length for our legs I want the final resting height of the bench to be 36 inches so I'm cutting the legs at 31 and 5/8 because the Castor's I'm going to be using are 4 inches tall and the plywood top is 3/8 thick once I cut the 4 legs then I cut 4 pieces of 2x4 at 69 inches to span the length of the bench and four pieces at 24 inches to cap the ends of the bench with the pieces cut we can focus on the assembly I like to assemble the workbench upside down making sure it's on a nice level surface building it upside down takes a lot of the guesswork out because if long as it's on a level surface you know that the tops going to be level since my other workbench has already built level in the same size this part is pretty simple but you could assemble it on the floor of your garage or your driveway just as long as it's level next I pre drill some pilot holes and start attaching the frame with two and a half inch screws and then I attach the frame to the legs with a single screw you could use lag bolts or carriage bolts if you wanted to but I find the two and a half inch screws work just fine the reason why I only use the single screw to attach the leg to the frame is because I like to check and make sure that everything is plumb before I drive in the remaining screws with the frame of the leg all together I can flip the workbench upside down and do the exact same thing on the bottom that will give us two shelves one on the top and then a bottom shelf from there I measure cut and install six 21 inch pieces of 2x4 to act as cross braces in the bench these will give structural strength to the bench and also give a really solid work surface since we're using thinner plywood for the top and bottom shelf now you could have installed the top three cross braces before you flipped it over unless you're like me and you're an idiot and you forgot and then you have to do it the way I did it you can space these out evenly across each shelf or spaced them out as needed if you plan on installing a tool or something inside the workbench I try to keep the spacing of them around 16 inches on center next we're ready to install our sheathing I move the bench outside and set it on the ground so I can work right on top of it setting the sheet of plywood directly on top of the bench I align and secure it with a few one-inch drywall screws making sure to line up the edges before screwing it down using my level and some trigger clamps I make my makeshift track saw that you guys have probably seen in some of my other videos lining everything up so the blade of my saw aligns with the edge of the framing for the workbench and then I cut off the excess from there I do the same thing lengthwise with the plywood except this time I'm using a straight piece of lumber to act as my saw guide since my level isn't long enough to reach the whole end of the table now if you're fancy enough to own a track saw you don't even need to worry about this low hack this second piece of cut-off plywood is actually going to be the top for the bottom shelf of our workbench all we have to do is notch out the corners with the jigsaw so that it fits with the top and bottom shelf in place can go around and attach them with some screws and make sure that they're fastened down so there's not any bouncing lastly we'll flip the bench over again and we'll add the caster wheels if it weren't for these wheels this bench would be extremely cheap to make but because mobility is a big thing for me and I like to have my benches be able to move and lock I spend the extra money on the caster wheels these wheels are about ten dollars a piece they're locking four inch caster wheels and I got them from Home Depot you could go cheaper if you wanted to but I always recommend keeping your workbench mobile and you definitely want it to be able to be locked in place so that's not moving around when you're doing stuff finally you want to make sure that your bench is strong and rolls effectively I like to do this with a little bit of flair what's cool about this workbench is you can really tailor it to whatever needs you want you can make it a router table you could make it into just a storage cabinet you can make it whatever you want it's mobile it's easy to use and easy to build and it's cheap which is what we care about that's it for this episode I hope you guys enjoyed it you know the drill about liking commenting all that so go ahead and do it be sure to subscribe make sure you follow me on social media via the links in the description below thank you guys so much for watching and I'll see you next time I rate these projects by how many f-bombs you're likely to drop while tackling the project this one is pretty easy now there are four basic types of faucets out there there are ball faucets cartridge faucets compression faucets and disc bosses each of them have a slightly different repair approach for the sake of this video I'm going to be focusing on a single handle kitchen ball faucet ...
“+10,000 Step By Step Plans ...even if you don't have a large workshop or expensive tools!“ Yes, Get Access To 12,000 Shed Plans! 👈


No comments