diy work table “+10,000 Step By Step Plans ...even if you don't have a large workshop or expensive tools!“ Download Today! 👈 ...
 diy work table
“+10,000 Step By Step Plans ...even if you don't have a large workshop or expensive tools!“ Download Today! 👈
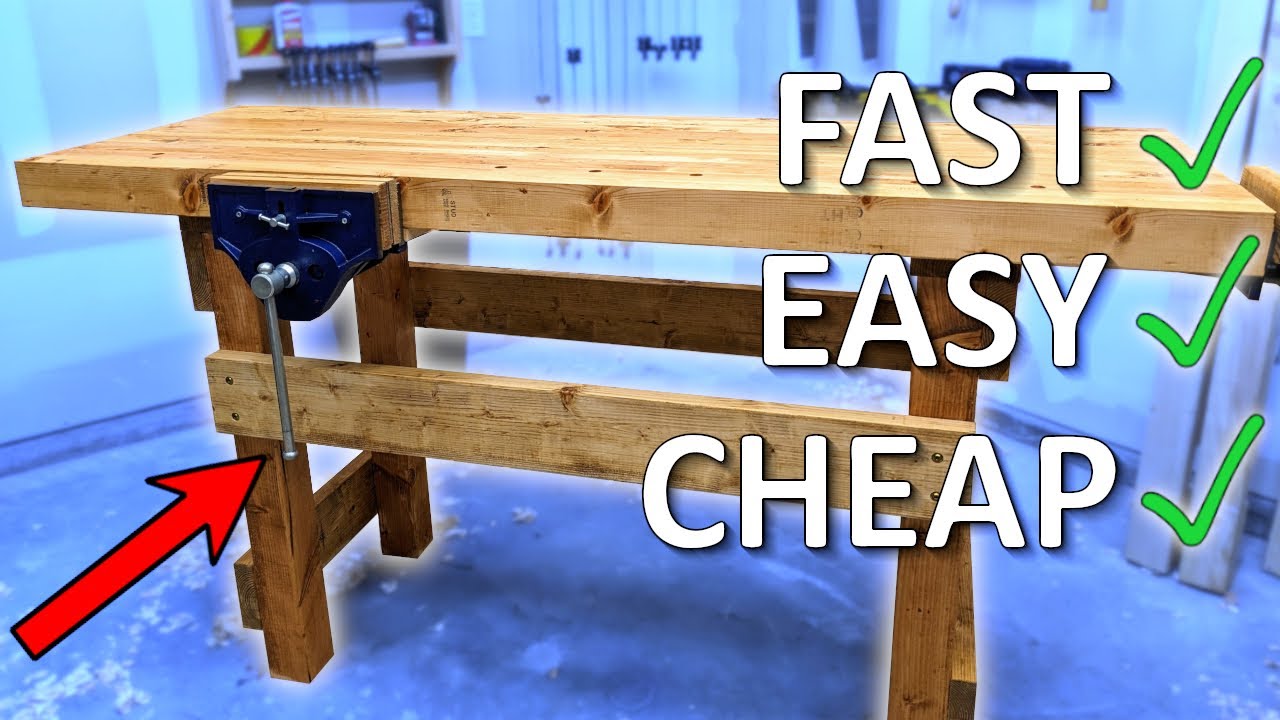
I wanted to make a totally Rock and workbench it didn't have any of the fancy joinery that honestly is going to be Out Of Reach of a new woodworker anyways I think I only used like three tools for the whole thing because if you haven't been following along I'm building out a workshop in the corner of this garage using just a few basic tools this 4x4 will make the legs of the bench and the weird thing I've noticed is that there is usually only one squared up Corner the rest are way off so I find the good corner and mark it out I mark it up and down the post in a couple different spots cuz I am just about to chop this baby up that squared up corner is going to be the outside on each of the bench legs when I started this little quest of building a workshop from zero the first thing I did was to make these saw horses to get a quick work surface off the ground that makes such a huge difference in being able to cut something accurately and not have an aching back and knees and I cut this bench leg down using the only way that wood can be cut a saw but when I go to cut the next leg I run into a little issue it's kind of an awkward position to get this thing balanced between the saw horses and still be able to cut it and I don't know about you guys but I think this might be the perfect time to showcase the magic of a saw horse cross brace now normally no one ever Cuts in the middle between two saw horses because that's just a good way to open your belly up with a circular saw but since this piece would be supported by that cross brace I totally could do that but wearing sandals and all I I just prefer to live life on the edge a little more cross brace magic here and I was originally planning to use this technique to cut half laap dovetail joinery for the bench but I decided instead to go for a dead simple functionality that even a brand new woodworker could successfully accomplish making a killer bench this is just one of those things that I think helps with accuracy it's so much easier to cut straight and square when the board's vertical like that but maybe it's just cuz I'm used to sawing with my boards clamped in of ice and here you can see how these posts are only Square on one corner really got to get that square corner right because to make this as an accessible project as possible I'm not doing any Stock Prep squaring up boards with a hand plane and if you don't put the square corner on the outside it's going to make the bench frame Twisted as I've been working on making this project editing the video I've been kind of thinking about YouTube social media and just all the issues affecting mental health anxiety and things like that I'm wondering if anyone else has ever felt like there's a barrier to achieving your full potential or just living with more happiness if so today's video sponsor better help maybe just the ticket and sometimes even if things are going really well we just need somebody to talk to talking to someone is one of the most important things you can do for yourself and if you think you might benefit from therapy you should definitely look into better help better help connects you with a licensed therapist who can give you helpful unbiased advice through a phone call video chat or even messaging there's over 30,000 licensed therapists opening a lot of options for finding a great therapist that may not be in your local area to get started there's a questionnaire to assess your specific needs then you get matched with a therapist usually in under 48 hours and if that therapist just isn't the right fit then you can easily switch to a different therapist at no additional cost without having to think about insurance who's in your network or anything like that over 4 million people have used better help to start living happier and healthier lives if you might benefit from therapy then click the link in the description or go to betterhelp.com Frank's workbench it not only helps support the channel but you'll get 10% off your first month at better help so you can connect with a therapist and see if it helps you the basics of this bench frame is made with two trestles where I join the 4x4s with some 2x sixes using a little line to help with positioning and Alignment but the round overs on construction Lumber make it hard to position right where I want it for that top dressel so to get that just right I stick the square out a little past the wood then bring it right into place using another block of wood and just like that I can get a nice position line where I can get the meat of that 2 by 6 flush with the top of the leg important for a reason that you will see momentarily and just remember to keep that outside corner when you're positioning these because that's pretty much the only way you could screw this up at this point now something worth noting for the notet takers is that these were cut to just about the exact same length close enough for government work anyway that makes it easy because I can just position these and flush them up to the outside of those posts and it's going to be just about right but maybe you're a maniac on a maniac's journey like me and let's just say this is your first time cutting wood using a handsaw those boards will not be the same length doesn't matter for this build instead of flushing it up on the outside measure the inside distance between them at the bottom and at the top and if the board's a little short who cares if it's a little long who cares or you could just cut it off afterwards have I mentioned yet that I'm totally digging these saw horse cross braces now to attach these things my first thought was a big old lag screw but this smaller shinier structural screw is apparently just as good actually even better than the big lag I mean really as long as you're just not using a deck screw the threads just don't have nearly the same bite and those things can snap pretty easily apparently you don't even have to drill a pilot hole because this tip does it for you but this is Doug fur and it'll split just by looking at it the wrong way so I'm going to put a little hole in it anyways these things are stupidly satisfying to drive in and they bite down like a pitbull want to throw this in here you could totally amp up this cross brace joinery just by adding some blocking you could even turn it into a mortise and Tenon by adding some blocking and then throwing another piece of wood on toping the screws through that 2x4 sandwich I made this bench about a simple as possible but there's more to it than just cut a piece of wood and drive a bolt for example the frame there's this a bunch of ways that the frame can get twisted and also several ways to fix a twisted frame if that kind of thing isn't totally obvious to you and you're thinking about building this bench pick up the plans it's going to lay it all out and it's just for the cost of probably like two or 3 2x4s when we moved in here I tried different arrangements and my old bench was just too big for the space this bench needs to be a little shorter so I attach the cross rails to connect the two trestles flip the old girl around and attach the other cross rail but check this out it's splayed out a little bit so I brought back my good buddy from the last video the Rope which works really good especially because most people aren't going to have a clamp long enough to reach across the two trestles that are 48 in or so apart so I lasso it like any good Texan should pull the little string and when it's right where I want it lock the string into place and go ahead and throw a few more bones in your retirement savings because you just saved yourself from having to buy a long clamp but those trestles aren't done yet we still need to attach a bearer board which is what is the bridge that's going to connect the bench top to the trestles and sink those down pretty good so that the screw head does not protrude up on the top of that some of you may wonder why I'm putting packing tape on my saw horses others are going to remember that we just made trestles and I don't want to glue the bench top to the saw horses I glue this bench top Up All In One go and that turned out to be a big mistake like the rest of the bench I did no Stock Prep on the boards now I'd made sure that I could get them all together by squeezing the life out of them with clamps however I should have done this in two sections Because by the time I'd glued everything up I really wasn't able to squeeze the boards together as much as I really wanted to the other thing that I totally brain farted on was to use calls to keep the top flat you can see them here because I put them on after it pretty much already dried but the damage was done this thing was a potato chip oh well life goes on we'll figure that out in a little bit but for now I need to cross cut this thing down to length so I use my Straight is F Edge and go at it with the only saw I've been using for cross cutting hand saww now how long does it actually take to cut through a big chunk of wood like this with a super dull handsaw well I was wondering the same thing so I decided to time it and look at this after 8:00 p.m. guys I am burning the midnight oil here for y'all I know some of y'all may not know that 800 p.m. is midnight but that's because you're either under age 30 or you don't have kids yet back and forth back and forth up and down up and down just keep rocking and rolling trying to stick right next to that line the whole time I don't stop the timer when I'm moving the camera and all that kind of stuff and kind of curious if anyone's making a guess how long this is actually going to take if so drop a comment but keep in mind the saw is not very aggressive for this big of a cut and it's dull so if this were a speed competition I'd be getting embarrassed I figured even with a dull saw surely I I couldn't do any worse than 30 seconds per 2x4 that's about 16 boards so I was guessing it would take a Max of around 8 minutes uh and it looks like I surprised myself yet again but still at the end of the day it's not like it's that much time now I need to flatten this thing out while at the same time maximizing the thickness of the top I take coarse shavings with a scrub plane on the boards that are sticking up the highest and once I've taken those High boards down I start traversing going at a diagonal Direction all the way across before changing the diagonal and going all the way down the bench again I do this back and forth until I'm taking shavings all the way across indicating a mostly flat top once I've had all the fun I feel like having with the scrub plane I switch over to a jack plane a number five and I try to bring down those deep ridges just a little bit the Jack plane is as far as I go on this bench top I don't bring it all the way down where it's perfect I don't even use my Joiner plane I just want this pretty flat and ready to do some real work once again I risk the attachment of my toes for your viewing entertainment because now I need to put this slab on top of the bench frame no surprise but I managed to put this slab on the bench frame just about as smoothly as I took it off of the saw horses but one way or another it makes it up there one problem you might remember though is that this thing cuffed up like a potato chip and I don't want to lose a lot of benchtop thickness so I'm not going to flatten the underside but I'm going to Mark out where those bearers are those 2x6 bearers flip this bad boy back over and just where those bearers go I'm going to flatten that area out this way it's flat where I need it but I'm not losing a lot of thickness on the whole bench Toop take a look at this I haven't done this side yet super high in the center compare that to this side nice and flat right where I need it I also do the same thing in this area where I'm going to attach the Vise cuz it has to have a 90° connection between the base and the front edge so that that Vie isn't messed up here you can see that it's a little high right at that edge so I just Nick at that with a scrub plane right on that front edge want to get that a nice 90° angle so the the viice is going to work uh just like I want it to and honestly all this extra work probably could have been avoided if I was a little bit more careful with the glue up in the first place I'm going to use this extra board to make sure that my Vie doesn't poke up past the top of the benchtop I Mark out just what I need and I cut that thing to size now I need to attach the Vie to the benchtop or the underside of the benchtop could use these big lag screws but once again I'm going for the construction uh structural screws if this thing falls off and crushes one of my feet you guys will be the first to know but all jokes aside I've used this Vice before on an old bench and the way I'm about to show this install is infinitely more secure than I've used it in the past so I have no worries about this thing falling off I drill some pilot holes but it's more so just to guide the screws more than anything else to be honest with you and then when I drive them I leave a little bit of wiggle and then I'll snug them all up at the end and now that I've doubled the weight or Crush power of this bench top flip it back around and see if I can avoid a trip to the ER and now to attach the bench top to the frame I'm just going to take some of those structural screws and send them straight through the bearers if you're a little OCD you could drill an oversized hole in that bear do a couple of washers allow for the wood movement not doing any of that so now we need to make some bench jaws and I press this in this will give me the location I need for the holes to drill through that front plate of the visce uh to attach that jaw to the to the Vie the thing I love about this iron Vie or steel Vice or whatever it is is that it holds the wood so tight that even when it's sticking up that far away from the ice Cuts just really well and when you angle this up after you already have a big long curf like that pretty much keeps the saw right in line no problem getting nice accurate cut but obviously that's way too wide to be the vice jaw so I'm going to rip this in half and by the way those that stuff you can see all over the saw I rub paraffin wax not only on the bottom of my planes but also on my Saws and as I'm moving this thing around on the visce to cut this up I'm trying to to avoid those screws that are in the Vise cuz I don't want to get any extra indentations other than the ones that I actually want flip this thing around finish from the other side to attach this Vise Jaw to the Vie I'm going to take out those first two screws that I first put in to hold it in place I'll put the I'll drill a hole through those indentations and then attach it right through the same spot I kind of back the screws off so that I can feel it click into place when it hits those screw threads that were there in the first place and then I put it right back in the hole that I drilled was oversized so that I have a little bit of wiggle room so I can get this thing flushed up to the bench top and then I'll cinch it down and when I do cinch it down I'm going to put it in deep so that it's not going to be marring the surfaces of any pieces of wood that I clamp in the Vise the other side is a lot easier to install nothing to it but clamping that piece of wood in the Vise and then I put a few screws into it from the outside I felt like 1 in screws would be perfect for some reason I have no idea where mine are I had some one and a quar and I was a little worried those was were going to poke through when I drove them in all the way but turned out to work out perfectly so just put a couple pilot holes in there stuck the screws in there no problems and for a tail Vie I love the inset Vie but this time I just went with what I had laying around maybe I'll upgrade this to an inset Vie at some point but I just threw this thing in there with a couple deck screws it'll be enough to clamp a piece of wood to some dog holes that I'm now going to screw down the line of the bench toop and pro tip for you guys especially if you're using hold fasts uh softwood bench tops sometimes the hold FL fast when you loosen it can like break off a chunk of the wood and stuff so one thing you can do is get some super glue and just drip it in around that top Edge it soaks into the end grain it doesn't make the hole any smaller but it makes it a lot stronger if anyone here remembers the nichelson bench that I used to use that thing was finished with tongue oil I loved it it was awesome my last workbench that big awesome one honestly the only thing I don't love about it is the finish so with this one I'm going back to tongue oil but I'm using dark tongue oil hopefully it'll give this like a little bit of an aged appearance tongue oil I think is probably the best workbench finish you can use glue won't stick to it it finishes really well it hardens pretty well so I just spread this around very liberally heavily and let it soak in for about a day and then I wipe it off with a dry paper cloth the next day the dark tongue oil gives it sort of an aged appearance I really like it plus this bench you can still see some of the tear out some of the deep grooves from the uh scrub plane when I was planing this benchtop flat I really think I don't know it's just a Cool vibe that it gives it so now I need to add a a jawliner it really comes down to using either kber or leather and so I'm using this super sticky double-sided tape stuff and as you can see I've got two little helpers that have decided to join me in the shop and he looks like he's going to grab his broom time to brush I saw them take the broom and they were telling me they were going to help me clean so for some reason I thought they were going to be sweeping up my pile of wood shavings and putting in the trash can I have no idea where I got that idea but anyway I put the kber onto that double-sided tape works really well but I probably could have done this part before oiling the bench and then I just use a little knife to cut that off flush with the edges and you get a super clean effective nice surface kber works really good it has a little bit of give but it's very grippy so when you when you grab wood in that Vie you don't have to squeeze quite as hard with the Vie because it just holds on to it well it doesn't slip doesn't move as for all the cleaning that I thought my boys were doing my nice swept up pile of wood shavings were not in the trash can at all but in a refrigerator bucket and all over the place but hey they were focused and working hard I hope the video was helpful and I will see you guys on the next one ...
“+10,000 Step By Step Plans ...even if you don't have a large workshop or expensive tools!“ Download Today! 👈


No comments