best woodworking table “+10,000 Step By Step Plans ...even if you don't have a large workshop or expensive tools!“ Download To...
 best woodworking table
“+10,000 Step By Step Plans ...even if you don't have a large workshop or expensive tools!“ Download Today! 👈
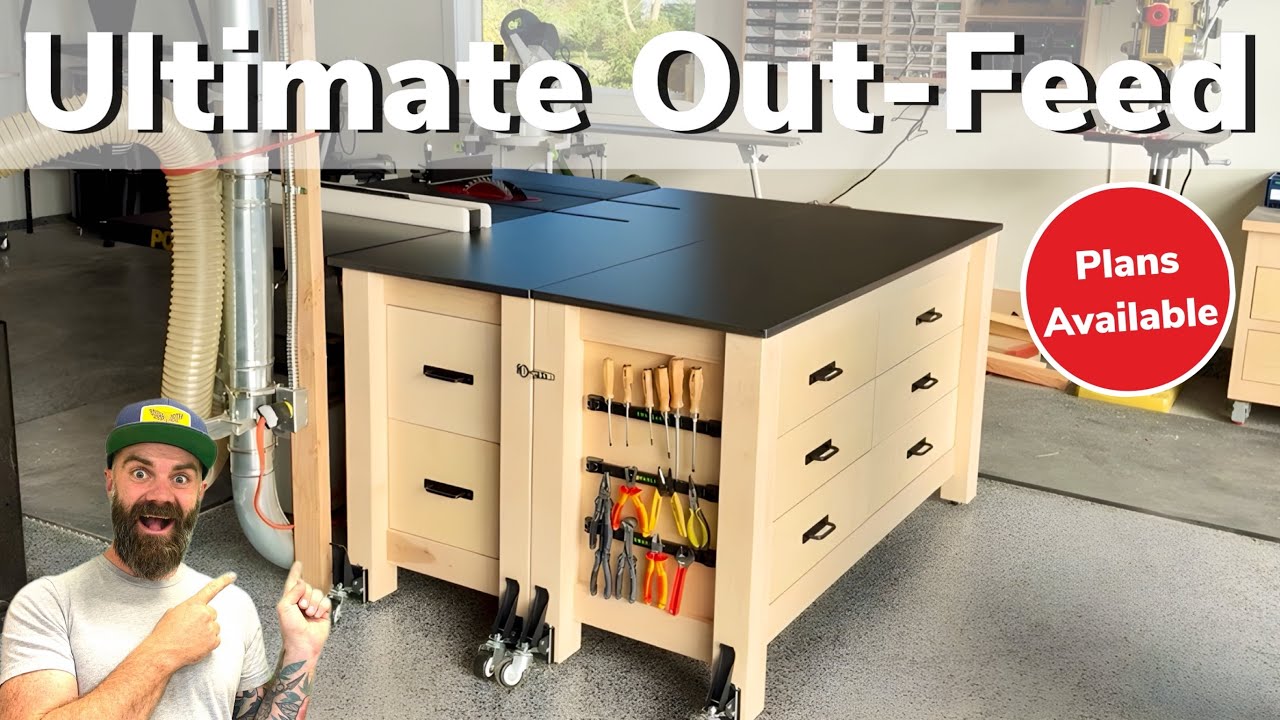
oh hi in this video I'm going to show you how I made this outfeed table that's pretty much it so follow along check the video description for all the products and parts we used also in the video description there's a link to the bourbon blade which is in stock right now on the website if you haven't got yours yet you should have it over there you should you should head over there and do that because Christmas is coming up it makes a great gift and we're going to run out so go get one all right watch the [Music] video the shop might look a little different than you remember it last time because we got some new tools set up we got some cool things from Powermatic a new table sawce set up we got the band saw the drill press and everything is starting to look pretty good ooh ah oh there's just one slight problem this table saw needs an outfeed table now I've built many an outfeed table in my life and the last one I built was ginormous because I had a big shop but this is not a big shop it's a mediumsized shop so we're going to have to build a mediumsized outf table and I'm well aware that space is limited so I wanted to design a table that would be multi-functional not just one big giant Square giant Square that's what they used to call me in Middle School anyways I grabbed a snack got on my computer and I designed this now I know it doesn't look that wonderful on the SketchUp file but my idea is simple instead of one outfeed table I do two Separate Tables one of them will permanently stay next to the table saw and the other one will be on casters so I can wield around have it for a larger outfeed table if I want or move it for just a separate work surface if that's what I need so I went to the store and I bought some wood now I'm going to construct this table out of a combination of solid white Maple and birch plywood why did I choose those two things I don't know that's just what they had in stock at the store and it was on sale now I don't want this thing to be flimsy I want to be able to jump on it dive on it slide across it so I'm going to make the legs out of solid Maple and I'm going to glue up two pieces of 84 then plain and Mill it down until they're 3 and 1/2 in by 3 and 1/2 in so I grab some 8/4 and I started cutting it roughly to the right length making sure to leave a few inches that I can cut off and get it exactly perfect once all the milling and gluing is done once I got all of my pieces chopped down to the right length I started ripping them to the right width on the table saw now I don't have a joiner set up in this smaller shop yet but lucky for me all of these pieces of 8 quarter had one Edge already straight lined and although it wasn't perfect it was close enough I started with that straight line against my table saw fence I ripped all the boards in half right down the middle and then I flipped all the boards over with that freshly cut side right against the table saw fence and I cut them all to their final width now it was time to plan them down a little bit because two pieces of 8/4 SLA together was going to be more than 3 and 1/2 in and I was a little excited because I got to use the planer that I just outfitted in my last video so that's fun I started running all those pieces of maple through the planer and slowly bringing them down to the right thickness and I mean slowly because as nice as this planer is you can't take too much off or it gets angry at you so you got to do light passes but pretty soon I had all the pieces M down and once glued together these will be nice 3 and 1/2 by 3 and 1/2 blocks now because I did all of my Milling ahead of time meaning I can't Mill them after I glue them at least not very much I want to make sure that they glue together pretty darn perfect so I'm going to sandwich some dominoes in between each block to help with alignment so I pulled out the trusty Domino Joiner now again I'm just putting these in there for alignment they're not going to add to the strength of the overall glue up because that's a lot of long grain to long grain gluing action and you just don't need the strength but to keep them from Slip Sliding around well those dominoes are going to come in pretty handy so I morti a few holes roughly in the center of each board I just added one Domino on each end I figured that would be good enough and then I added just a light amount of glue a lot of people want to just fill the entire Center of this kind of glue up with glue and you just don't need it less sometimes is more and more is sometimes less and I mean less cleanup because you don't have all that squeeze out all over the place once I got them hooked together with those dominoes I threw on some clamps and then I rinsed and repeated until I had not four but eight solid pieces of maple all glued up that will eventually become my legs I let these sit to do their thing overnight not that they needed that much time it just happened to be the end of the day and I came out the next morning took them all out of clamps and it was time to whip them into shape I don't mean literally whip them that wouldn't do a lot I'm going to just send them through the planer one more time take just a 30 second of an inch off to get rid of that glue and then it was over to the miter saw to cut them to their final length and now they're really starting to look like nice Maple legs I just have to build the rest of the table structure and for that I'm using again maple but this time 3/4 or in this case 1316 because you ask for 3/4 they actually give you 13/16 cuz they expect you're going to Mill it a little bit so I took these boards over to the table saw they also had a straight line on one Edge and I ripped them all down to 3 and 1/2 in wide because well it matches the legs and I thought it would look nice then I got back on my computer to figure out all my measurements for my various parts and pieces for all the stretchers and supports then back over to the miter side to cut all of those pieces to length pretty soon I had all of these structural components for my tables completely cut to the right size and I could start to figure out all of my joinery now whenever I'm doing tables with legs you're probably like don't all tables have legs well no some tables have pedestal bases so stick with me on this I like to take my four legs push them together and then make sure I get them all oriented in the correct direction because I want all my seams going together I don't want them all mismatched so I draw on the top and mark them all so I can get them back into that orientation once I do all my joinery and then I needed to create a little template to help me lay out all of my dominoes now all of the stretchers and all of the legs on all the various tables are going to be hooked together at the exact same location which means I can make this one template with my marks on there for my dominoes stick it on the end of my leg and then just transfer those marks onto each leg and I know exactly where to mortise out with my Domino Joiner and I don't have to keep all of the pieces in a certain order because they're all identical so if I grab the wrong piece and hook it onto the wrong leg it doesn't matter cuz they're all the same when it comes to hooking these stretcher pieces into the leg I wanted to make sure that I inset them exactly 3/4 of an inch from the back of the leg that's not going to make a lot of sense right now but it will he in a little bit so just stick with me on that so I used a 3/4 in setup Block in from the outside of the leg and then I used 38 of an in setup blocks to find the dead center of my stretcher piece but that stretcher piece is actually 1316 so I used 38 plus 13 second and that got me the dead center of the piece hopefully that wasn't confusing next I had to set up my Domino Joiner so I could hit that dead center of the stretcher piece so that when I hooked The Dominoes into the stretcher and I put them into the leg I still had that 3/4 of an inch gap on the back side of the leg again that's a lot of numbers and this might not make any sense but it will later on in the video so just hang tight I had to add mortices at the top of the leg and also towards the bottom because there's stretchers on the top and the bottom so I Zip Zap Zed with the Domino Joiner and pretty soon all of my legs were more to St then I use that exact same template that I used to mark on the legs and I used it to Mark out where I needed to add Dominoes on all of the stretcher pieces so I marked marked here and I marked marked there and I got a level with you I pretty much marked everywhere over and over and over again because there were a lot of stretcher pieces once I had them all marked though then I got the thrill of mortising all of them out twice on each side once all of my pieces were mortised out I wanted to make the legs a little fancier before I hooked everything together so I grabbed this chering bit from bits and bits there is a link in the video description and I added a nice little champer to all the corners of my legs then I always like to pre-and everything before I glue it up because it's just way easier so I sanded everything thoroughly where the heck was Craig I don't know then I added glue and dominoes and I started hooking all of my various parts and pieces together I'm going to do this as a two-stage glue up meaning I'm going to glue together my end cap kind of sections of the table base once those dry then I'll glue the longer sections on that'll just make it less crazy to try and do all of it at once glue-ups are always stressful as it is and there's no reason to make them harder than they need to be so a little glue a little tap tap taparoo with the hammer and pretty soon soon I had all of my little end sections of my two outfeed tables glued up and in clamps I let these sit a good 40 minutes trying to be as patient as I could before I pulled them out of clamps and it was time to do the second phase of our glue up which was our longer stretcher pieces now this required a lot more dominoes and a lot more glue at one time so I enlisted Craig to come help me so that we could move fast and in no time we had all of our pieces put together and our end caps slapped in place and we had one of our two tables glued up once we had it all hooked up we just laid it down on the floor added some longer pipe clamps this time and it was starting to look like an actual table with Craig's help I got the second table glued up as well and while I waited for the glue to dry I decided to start cutting all of my plywood panels to make them look more you know shoppy organizational pretty insert adjective anyways I ripped all the plywood down on the table saw then I cut it to the final length using the track saw being very careful not to cut into my brand new table saw that would be bad for the saw as well as bad for the blade I ripped the smaller sections down on the table saw and then when I had all of my pieces cut cut I added some pocket holes to the sides of each panel you might be thinking pocket holes really well this is shop Furniture so we're going to do things a little bit different to make sure that it goes quick and easy but it's still going to look nice I'll show you what these pocket holes are for in just a second once I added the pocket holes to the smaller panels I added pocket holes to the sides of the larger panels as well and we were ready to hook the panels into place so I took the clamps off of our tables it had been a good 30 minutes at this point so that glue's got to be dry and I started inserting my panels now if this was a fine piece of furniture I probably would have made these panels float in between the legs and those upper rails and styles so that it looked really nice on the inside as well as on the outside but because I set those stretcher pieces in from the leg 3/4 of an inch it gave us this perfect spot to set our 3/4 in ply W and make everything flush on the inside of the table which is going to be really handy when it comes to installing our drawer slides because we're not going to have to fur out the edges to install those slides once I screwed in the top and bottom of the panel just with some screws right into the stretcher I used those pocket holes that I drilled to screw in the side of the panel directly into the leg locking everything into the place and from the outside it really just looks like a floating panel no nobody's ever going to know we just slapped some screws in there with my panels secure in my first table I pushed it aside and it was time to do the exact same thing to table number two although these panels are going to be oriented in a slightly different manner the first table the ends are open so that I can install drawers that are accessible on either side of the table saw however on this second table the front is going to be open so that that will all be drawers so that when the two tables are push together you're not covering up any of your drawer storage see despite what you might think I actually do have a plan sometimes once I had all the panels in the second table it was time to start figuring out how to install our bottom panel for this I'm just going to go super simple I started out by taking measurements off of each individual table to get the correct internal lengths then I cut down some scrap pieces of plywood that were exactly 3/4 of an inch shorter in width than my stretcher pieces so my stretcher pieces are 3 and 1/2 in and these pieces are 2 and 3/4 and you might be asking why but why why well I'll show you here in just a second essentially we're creating a nice lip around the entire bottom of the table that we can then recess our bottom panel down into it'll sit on top of that lip and it'll still sit flush with the top of that stretch so I just went around the whole thing cutting all the pieces to the right size and screwing them in place once I had all those done I flipped the entire thing over and then well and then I was hungry oh hey this video is sponsored by Chomps I love Chomps I've been eating them for a long time because working out in the shop you can't always stop and go eat a big lunch but I need protein these are zero sugar they're packed to like 10 to 12 G of protein per stick and they're easy to grab watch this look how easy that was I keep them literally just all over my shop like right here why won't this work oh chops I can grab one on the go if I'm going out to a job site I throw some in my truck take them with me my favorite one is these Italian style beef sticks they're delicious I also love the jalapeno ones I don't know do you guys like jalapenos let me know in the comment section if you like Chomps what's your favorite flavor cuz maybe there's a flavor I haven't tried yet you should also go check them out at the link in the video description t if you're looking for a good snack in the shop it's easy to eat well tromps is easy it's also flipping delicious so this [Music] try with that nice lip created around the perimeter of the bottom of our table we now had the perfect surface to drop in that bottom panel so I cut a panel to fit dropped it in there and then I just sent some screws right through the top of the panel into those lip pieces I mean again this is shop Furniture so we're building it different don't won hold me to this style of building for everything I feel like the fun thing about shop Furniture is you can get away with a lot more just slapping stuff together but we still want it to look nice so I made sure to keep all of the screws on the inside where you're not going to see them so for this middle panel I just hooked it in with more pocket holes once I had that table done I pushed it aside and then it was time to do the exact same thing to the bottom of the other table table but I won't make you watch that whole process because you already saw that once another thing I wanted to do before these tables got too heavy and it was hard to flip them over was add some self-leveling feet to the bottom of each leg I did this because you're never going to hit that height perfect when you're trying to match your table saw so I always make my outed tables a little bit shorter than they need to be and then I can erase them to exactly the right height with these self-leveling feet they're super easy to install I'll include a link in the video description step one you recess a little hole in the top of each foot with a large forer bit then you drill a deeper hole in the center of that hole so that the entire leveling system can sit down in there you also have to make sure that Center hole is deep enough for the bolt of the actual self-leveling foot then you pre-drill and screw the bracket in place then you take your leveling foot and you just thread it into the bracket all the way down and boom goes the dynamite you have your self-leveling foot installed you just repeat that process on every leg and now there's feet on your table pretty confident that that was the last time I'm going to have to flip these upside down I decided it was a good time to install my drawer slides I'm doing three drawers per opening and they're all going to be identical in size so I took the entire height of my opening I divided it by three and then I cut some scrap pieces of plywood so that I could use those to space out my drawer slides I start with the biggest piece doing that top drawer slide first then I do the smaller piece doing the drawer slide down below and then finally I put the last drawer slide right on the bottom on these side openings on the other table I did two drawers per opening cuz I figured it'd be nice to have some bigger drawers then I slid the carcasses in front of my table saw and believe it or not they were starting to look pretty good yeah time to make drawers I figured as long as the carcasses of the tables were here we should use them as an outf table so I slapped a scrap piece of 3/4 in plywood on the top so that it would work a little more efficiently and we started ripping down Baltic Birch to the correct width for all of our drawer box pieces once I had a bunch of strips ripped down to the right size it was time to add a nice little Groove a/2 in up from the bottom of each piece that will hold the bottom panel of the drawer so I ran each piece back through the table saw a couple times until I had a nice 1/ quarin Groove then I went over to my drawer slides I took the measurements directly off the slides because well that's the best way to know what size drawer box you need to make and then it was over to the chops saw to start cutting down all of my various parts and pieces then before I started assembling anything I decided to sand all of my pieces because it's really hard to sand the inside of a drawer box much easier if if you do it ahead of time and then it was time to start assembling drawers for this I'm just doing it the old quick and easy glue and nail method which if you couldn't figure out what that means by that description you well you add some glue and then you add some nails and believe it or not this makes some pretty darn strong drawers I'm using Bloom undermount drawer slides for all the drawers which means I had to install the bloom orange clippy thing things on the bottom of each drawer and drill the little hole in the back of the drawer if you don't know what I'm talking about I have multiple videos at this point on how to construct drawers so you can go find one of those on my main Channel with my drawer boxes built I started clipping them all into place this is always the most satisfying part of any build that involves drawers because you go from an empty box to a lot of storage really quick and there's just something really nice about that now these table still need a top and I'm sure you've been wondering what are you going to do for the top and I'm glad you asked because that's what we're doing next now in the past I have used laminate for the top of my work tables because it's really smooth glue doesn't stick to it and it's awesome but that's when I found out that for Micah where I usually get my laminate also sells this solid surface product it's called formica compact it's essentially a phenolic top it's the same stuff that would be on a stock router table that You' buy at the store it's super dense it's crazy strong it comes in a zillion different colors and you can cut it on your table saw and shape it just like wood but you might need a friend because a dimension it's also ridiculously heavy so we hauled a sheet over to the shop and we started ripping down pieces on the table saw to the correct size for our tabletops once we had them cut to the correct width which was pretty fun because I always cut wood on my table saw so every once in a while it's nice to cut something a little different then I pulled out the track saw and we cut them all to the correct length at this point all the corners and edges were pretty sharp and Pokey so I decided to round them all over and soften them a little bit so I got this sweet compression bit also from bits and bits I'll include a link in the video description and this little round over corner template I bought on Amazon I'll includ a link in the video description and I rounded over all the corners and then I grabbed a roundover bit just like an e in and I added a nice little round over to the top edge of both of my pieces and then I wasn't ready to put them on the top yet but I just couldn't help myself cuz I knew it was going to look really cool so I grabbed both of the pieces and I slid them in place just so I could get you know a first look of kind of what the table was going to feel like and I mean you got to admit that looks pretty fresh and pretty clean and all I did was grab a sheet of for Mica Compact and cut it to the right size pretty cool stuff now you might be asking how are you going to attach the tops to the tables well I'm glad you asked that for that I'm going to use the zclip Fasteners so I grabbed the Domino Joiner and I just mortised out a bunch of little holes around the top perimeter of the table so that those zclip Fasteners could sit in there one end sits into the little mortise and then the other end gets screwed to the tabl toop then I grabbed my tops put them back on and made sure they were positioned exactly where I wanted them to be I clamped them in place so they couldn't move around and then I crawled inside a dark place I mean literally I crawled inside the the dark place that is the inside of the table and I screwed all of the z-clip Fasteners into the FICA compact now I will say you definitely have to pre-drill all of your holes because that stuff is so dense if you don't you're just going to be snapping the heads off of screws before long I had both tabletops installed and I pushed them together and ah look at that so fresh and so clean I especially like the way the black matches the black of the PowerMax armor Glide look at that then it was time to make drawer faces for the drawer faces I'm just going to cut down some more halfin Baltic Birch so I took all my measurements off of my boxes and I started ripping down some halfin Birch to the correct widths and lengths and all that stuff once I had them all to the right size I gave everything a nice once over with the Sanders so it was smooth and you know less splintery and then it's always easier to work on a flat surface than on a vertical surface so before I mounted all the drawer faces I marked out where all of my hardware needed to be screwed on using this cool jig from true position tools I will also include a link in the video description then I used the classic playing card method to make sure all my reveals were right on the drawer faces I used a little double-sided tape to stick the drawer faces to the drawer box and then I permanently secured the faces with some screws from the inside of the drawer box next using those pre-marked markings that's how you say that I added all that black Hardware onto the front of each drawer pretty soon I had all these smaller drawers on the front done and all of the drawers on the sides done as well and things were really starting to come together now I had these blank areas of plywood on each side of the table and I thought that's a waste of space I might as well film with something so I got these little magnetic tool holders on Amazon which I figured would be a good place just to you know store some extra tools and I also found out I could tuck my chisels in the top that's nice one of the last things I need to do is cut some miter slots into the top of that first table because right now my miter gauge can't slide far enough to get past the blade so very carefully I used a ruler to Mark out exactly where I needed to add those slots on both sides I'm using the bourbon blade there in case you didn't notice available at bourbon moth.com then using my Fest tool router 78593 that's not right but it's a router with a number on it that's all I can remember and the track system I very carefully added a nice 3/8 in deep little Groove that should match those miter slots pretty good I mean we'll find out in just a second but between you and me I think I kind of nailed this one wait for it hold on oh yeah easy peasy lemon squeezy then I pushed the tables back together for like the 30th time and you might be thinking wouldn't that be a lot easier if they had some wheels on the bottom well I'm so glad you said that because believe it or not that's the next step now in order to add casters to these and still have the leveling feet the casters have to be mounted on the side but luckily they make casters that are removable pretty easily you see you install this plate and then the Caster slides and locks into the plate and then you put in this little pin to lock the Caster in place then you can just push on the edge of the casters like this and like that and all of a sudden you've lifted your table up and you can wheel it around wherever you want so I can leave the one table there at the end of the sauce still have somewhat of an outfeed table and then I can move this around to have a work surface wherever I want it or I can Lounge seductively on top of it and stare at the camera but no we're not going to do that so I wheeled it back into place for like the 100th time and then I installed these little metal latches on either end just to ensure that it's not going to you know be pushed out of place when you're running material across it and with that I'm pretty sure these outf tables are done all in all this was a pretty simple project it literally took me about 3 and 1/2 days to construct and build both tables and I think they look pretty darn good in the space I know some people might say it's overkill for shop Furniture but here's my theory on this you spend a lot of time in your shop you might as well make it look as nice as possible and in case you were wondering this is how easy it is to remove those casters you just pull the pin pop them off and then they're not going to be a trip Hazard when you're walking around your shop you thought I was going to run in from that way didn't you I was got to keep you guessing you thought you thought I was going to go down there and then I was going to pop back up over there well you're right hopefully you enjoyed that video hopefully you learn something there's links down in the video description for all the parts and pieces that we use so check those out there's also a link to the bourbon blade quantity is limited on our website so if you haven't ordered one yet I would head over there and do so they make a great Christmas gift but we're probably going to sell out before we get to Christmas so if you want one Now's the Time to do it and then we'll still take pre-orders on the next batch but the ones that are in stock I'd go get one now also go sign up for patreon we love our patrons we're having a lot of fun over there Link in the video description [Music] ...
“+10,000 Step By Step Plans ...even if you don't have a large workshop or expensive tools!“ Download Today! 👈


No comments