wood tool cabinet “+10,000 Step By Step Plans ...even if you don't have a large workshop or expensive tools!“ Yes, Get Access T...
 wood tool cabinet
“+10,000 Step By Step Plans ...even if you don't have a large workshop or expensive tools!“ Yes, Get Access To 12,000 shed Plans! 👈
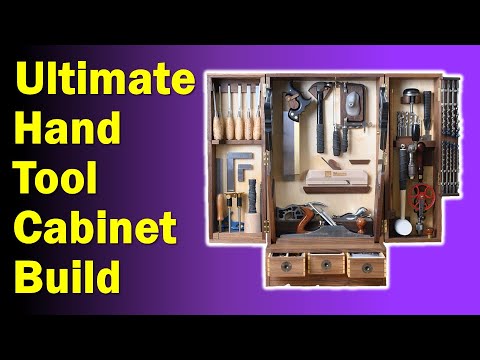
hi I'm Rob cin welcome to my shop I just spent over a year building this Woodwork and tool cabinet it was a fun project thoroughly enjoy doing it I think you're going to be interested I'm going to give you a tour show you all the details all the bits Stay With [Music] Me the idea for this actually started off off it was going to be a project for a weeklong hand to a workshop I laugh now because after I got working on the Prototype I thought this is never going to get done in the week but I really liked it I wanted to complete it I had a good idea that I wanted to see through so we used it as one of our projects for our online Workshop now if that interests you you can always become a member and you can see the entire build but um what I want to do right now I want to open it up let you see it real quick and then we're going to go through and I'm going to talk to you about every aspect of it go through the whole process of what we did start off with the Prototype I'll show you that and then show you some of the things that I think are unique and also some things that maybe I would have done a little bit differently so we designed it to be locked up so you turn the key got to remember which way open this up there are two wings and in order to hold the wings in place we had to get a little creative with these special little uh what do we call them I don't even know what do we call them but I'll show you why we had to be creative with them after we go a little more of a deeper dive one on either side just screw them in I thought about knurling this but I said nah doesn't need that much force you just want it to be held in place when you're lifting chisels out push this back so there's two Wings this is designed to hold what I would consider to be essential uh hand tool woodworking tools of course there's going to be some things that you're going to need that there wouldn't be room for we also have three drawers everything is lockable we've got saw tails on either side for both your cross cut in your rip saw and I finished the back so that it would look just as good from all areas um by the way the three drawers I'll just open them up real quick and show you there they each have trays in them so that you can utilize the space better you get a deep drawer and as soon as you get to about an inch worth of junk you can't find anything else so by having a tray you increase the capacity and as I mentioned these are lockable from the inside so that when the whole thing is closed up it's quite secure all right let's start and right from the beginning initially and ended up making it so it would sit on top of a uh of a bench or a table I don't think you'd really want to mount this to the wall so that was the idea behind the size of course get everything nice and Compact and mostly hand tools in fact I think it's strictly hand tools so let me give you the dimensions of everything in case you want to you get an idea that you want to do something like this so the overall wids got to put my glasses on so I can see it I want to be careful not to scratch this with my measuring tape the width is 18 in the total depth meaning the bottom section is 10 and 5/8 the wings themselves are 4 in of course that's got a back in it so you don't have 4 in capacity 4 in depth you actually have 3 and 3/4 and then this top section you have a depth of six and A4 in again it has a back in it as well the height is 32 in um the wings outside Dimension is 8 and 78 inside you have 7 and 5/8 by 24 and 78 and the overall length of those is 26 and an eight what else do I need to tell you the drawers the drawers are five and shy five and 3/8 wide inside depth inside dimension is 4 and 3/4 now the overall length of the drawer the overall length is 10 and 8 the inside you have 8 and 7/8 and the depth that you have is 2 and 38 like I said I made the drawers I made the trays cute little dovetails specifically so that you would double the capacity of your drawer I'll state it again once you put a certain amount of material in there anything goes on top of it's going to hide the stuff below and then you can't find anything so by having that tray you get quite a bit in fact let me show you what I've got here so in the bottom I have an inch and 38 for depth and then the tray I won't bother giving you all those Dimensions but just so that you know the tray you have 116 depth and that's designed to fit in there nice and snugly okay next is the materials I can't remember why do we choose Walnut it's it's such a lovely Rich Wood and I had a supply of it so the majority of it is Walnut oh the other nice thing too is Walnut the Dov tails the end grain of the pins and Tails really stands out nicely so Walnut the majority of it the back panels are Baltic Birch and I left that white because it brightens it up so when you're looking in there instead of it being dark and shadowy you've got some brightness from the light reflecting off that light material um one thing I did that I would change the drawer sides are Aspen it's nice and white but the minute you put a finish on it I haven't I haven't oiled these up you can tell the difference the minute you put a finish on it goes yellow if I had done it again I would have used I would have gone the expense and used Holly which is a beautiful white lovely grained wood and I used Holly pardon me I used Aspen for the wedges in the uh in the through wedge tenons as well and I think that's all of the uh just those three Woods that are used I used quite a bit of brass and I paid the money to get decent Hardware so between the brass hinges I I had to modify most of this stuff I I'll get into that a little bit different but I would call the access the accent pieces brass although the tools are mostly um Chrome type color Chrome and black but you can't really count that in just the cabinet itself brass Walnut Aspen and Birch so here's how it started kind of a rough sketch I'm I'm not much for for doing drawings I've done it before but I don't enjoy it I much rather work with models or fullsize mockups did we make a model of this I don't think we did we went right into the fullsize mockup so this was made out of Baltic Birch and I tried to keep all the dimensions the same meaning I use 5H Bal Birch and that I was intending to use 5/8 solid Walnut but this was just screwed together but again I always make sure that everything is uh nice and square so when it goes together everything fits uh we made some changes from the real one to this I used a piano hinge no big deal just wanted to get the concept put in the drawers mistake I made was when I did this one I I made the door the trays the same Dimension which makes it extremely difficult to get at and hard to reach your thumb in there so I shortened those up on the actual one we changed some of the configuration here uh plane I think is in the same spot but we raised up the back and uh we had one saw over here but we needed room for two we changed the way that we hold the saws chisels pretty much stayed the same but the idea is relatively inexpensive build but allows you to figure out all the configuration for how you're going to actually hold your tools and it's a lot easier to make the changes in a prototype than is to make it in the real thing but so there's through dub tails on the four corners of each one of the Wings this is a little bit difficult because they were stepped you had a section here and then it jumps up onto the top so that was uh not the easiest thing in the world to do especially when it came to trying to plane this through wedge tenons I modified these and did them a little bit different instead of having the traditional through wedged I added the wedges on the outside I think we actually did a video on that but it it made made it a little bit less cumbersome in the building process and I even did it up here as well so you look down on here and this is this is the other part that I was a little bit disappointed in the color of the Aspen turns almost the same color as the Walnut so you don't get that contrast far more contrast from the ingrain of the Walnut if I had used Holly there that would have stood out now on the front the ends I purposely did that the uh ends of the tails on the drawer sides come all the way through the front but again they yellowed and wasn't 100% thrilled with that uh some more joinery issues if we look at the back I purposely left a little reveal everywhere so when this panel now I had to make this piece of the walnut plywood it I took a piece of Baltic Birch I took one layer off and then I had some uh Walnut veneer so I joined it and then glued that on so that I could have my own veneer on all three panels but I didn't want it to be flush anytime you're dealing with plywood so what I did instead is I purposely set it in so that there' be just a little bit of a shadow all the way around there I did that on on the wings I did on the back and if I can remember there was somewhere else I did it as well just anytime I had an opportunity to leave instead of being flush have it stand out a little bit you got to make sure you do enough so it doesn't look like a mistake but I wanted this to look just as good from the backside as it did from the front in terms of nice and finished and it's not something you're going to have to leave against the wall because of its appearance through wedge tenons on here actually underneath the uh plane the back side I knew they weren't going to be shown so instead of doing that I think I uh actually went in and doweled that and I dowed up from the bottom not going to be shown while I go through all the extra work hey if you like this video we have more our newsletter has subscriber only content monthly discount on tools and anything we bring out that's new subscribers get first crack at it click on the link below let's get back to work all right so this is the biggest section how we put all the tools in place and that was actually the biggest challenge because um nothing was uniform so every piece was going to be unique let's start over here in this Wing So I wanted my chisels obviously they had to stay in place and they had to prevent from falling out so I knew I needed magnets but I don't like seeing the magnets so what I did is I drilled the holes from the back side I put the magnets in with the cup very close to the surface that gives you a lot of holding power but you don't see the ugly magnets and then of course had to get all the angles on these pieces right so as you can tell they're sped and then each one sits down into a hole and then I actually went in I didn't want to see a u I didn't want to see the center of a screw or drill bit so I went in there and I rounded that out just so it would look a little more finished drop down here same thing with my now again I had to choose certain tools couldn't bring everything so my squares are held on same idea there's a magnet in behind with a little bit of a lip on either side so when you put that in there it holds it firmly enough that you don't have to worry about it falling off this one actually has two magnets my my straight edges I've got a 6 in over here that sits into a slot right there so it holds it nicely out of the way but easily easy to access my Mallet is here I put leather on the bottom just CU it softens it when you set it in place my marking gauges I have two marking gauges I use two a lot when I'm dub tailing and then in the back I have a smaller gauge rod with a smaller cutter for cleaning up the bottom of a mortise and there's my mortise gauge tucked in over there I've got my 12in combination Square in the back that sits into a slot doesn't get used as much and I recognize it in order to get it you have to move other tools but like I said it doesn't get used that much and this is a tool we call a cur X10 which is for used for finishing a half blind dovetail cut and that sits in there neatly and stays put okay we move over to this side then we'll come back to the center section so this is uh a lot of my drilling tools I have my winding sticks in here now the winding sticks sit into a slot leather in the bottom there's a finger hole up in some sa some shavings in there so you can push it up to access it this isn't the final set that's going to go in there but there will be a set in there and they sit in there so they don't side side to side and they're deep enough down in here that they won't fall forward now my brace and my drill are um antique ones that friend of mine Ernie has rehabbed for us so that lifts out these are my drill bits I can take with me and they're sitting on a brass pin so they'll stay in place but it's a nice little carry case that you can take around with you then that drops back in there actually leave this out for a second my Mount that I use quite a bit it's hanging on there this brass Rod is actually sloped so that when you put it on there it falls to the back side and then the head goes into that little hole so that it doesn't move around too much then my egg beater I take the handle out lift this out this is snug but it fits and that sits in there securely drop to put the top in first and then the bottom put that back in there and I have a flush trim saw that I use quite a bit and that sits down into a saw a little sleeve just have to bend it to fit it down in and then here's my drill bits and my bits are held in place with little Clips which is nice holds them securely this is hinged on I even dubv tailed the top and bottom just to kind of close it all in and make it look a little neater that folds in before you close the door now down here in the I will I will add that in order to have room for this I had to have the brace sticking out like this but when it closes that clears and it sits in here in an open space so it wasn't going to be an issue and it's actually quite convenient to be able to access just grab that right there with your hand don't have to move any other tools to get around it now before we get into this let's do the drawers uh I forgot to mention this I had to have some kind of Hardware that was not sticking out but still accessible the drawers are small so it couldn't be overly big so I got these and I thought about making them a shiny brass but I thought you know what I really don't want them to stand out I almost want them to be only noticed when you need them you reach in and it is rather small but it's it's usable the drawers are just a traditional fit which is no side to side slop a little bit of top of the bottom has a has a drawer stop right there a tray in each one now the configuration is different each tray and by the way in the back you have a piece of brass with a hole in it and that's part of the locking mechanism and I'll explain that in a second I used e inch uh Baltic Birch on the bottom and I have drawer slips draw slips just increase the width of the running surface so it'll last a lot longer before it starts wearing out uh this drawer has two long compartments the middle drawer has three running side to side and this one has one great big open space they need to be waxed up a little bit all right now this oh yeah there's I was mentioning areas where I set in this little uh this little part is set in the drawer fronts are set in and these dividers these vertical dividers are actually set in so it that just gives you a little bit of uh Shadow and just I think makes it a little more interesting rather than having it flush and it's a little bit easier to do I did the same thing over here here this piece is set in this is set in that's set in um any any pieces over here where two pieces come together I always set one in from the other just again I think it looks better okay now our Center section let's start on the outside so here I have my rip saww and that sleeve conveniently holds it in place we had to custom make all of the brass hardware my friend Willie did a lot of that for us big happy birthday to Willie I think he's 83 and he's still working hard that slide this is awkward to make and it had to be very stable so that it would hold the saw without being excessively big but we didn't want to close in and it'll just run on that little U ledge right there and leather everywhere so it just cushions the closing and on this side you have your cross cut saw fits the same way there's a stop here obviously so that that only comes out so far and it had to be had to clear this so we want to make sure that everything was nice and well thought out up here I have my three main saws but I I place them in the order they get used my dovetail saw gets used the most cross cut behind that Medium ton behind that so you move your toggle down it is awkward if you have to go in get the B the back one but I mean they all come out handles are all identical so when they sit on there it prevents them from falling off and also prevents them from sliding around and then the toggle just ensures that they don't come out this way I use a very small Hammer if you need a bigger Hammer you need better dovetails little toggle holds that in place the oil might have dried on that and that obviously had to be fit and I just I was lucky to find one the same color which goes nicely with it of course everything has to match now I'm going to drop down here for a moment so my main my main um plane is a 5 and a half this is what I use probably 90% of the time so that sits right here front and center I'm worried about this banging side to side but you know what it's a tool cabinet it's going to get marked up I don't want to do it now though and everything sits on leather now these are these are screwed in place with brass screws because of the way the locking mechanis mechanism of the drawer you had to be able to have access to that so that sits in there just in a little bit of a lip to say stay put over here you have your low angle block plane again sitting on leather and on this side you have your 3/4 3/4 shoulder plane that too sits on leather up here I have my drawer bottom plane made by Jesse rufian combat wet that does a lot of work for us and this is what I used for cutting the groove that holds the bottom of your drawer and uh it's just such a nice way to doing it instead of a router or a table SI even that sits in there comfortably this is my my small rotor plane my lil really like that and that set securely in there so it won't fall out uh this is the last piece so this by the way is something my son Jake invented this is called the grip this goes on the side on the side of your plane so when you're using it in a shooting board you actually have something to hold on to so that sits in there like that and gives you a very comfortable and good lots of control now we come back up here I have my my uh fret saw that I use for dove tailing and then I don't use a coping saw a ton but if you need to get large cut large curves you have to have it so this piece is actually sloped in the back so that when that sits on there it falls down in and isn't going to fall come off and this is on the same way there's a slope on the back side and that sits over there like that I need in order to store my grip I had to have something that was magnetized there's a little brass pin here that fits down in so we used that but I needed something for the magnet to stick to so in 2014 the Canadian government issued a quarter that was in commemorative of of the of veterans and that's the poppy and the maple e and behind it signifies Canada where's where this was built you cannot find a drill bit that matches the diameter of a quarter and I wasn't going to turn the quarter so what I did is I took a piece of Holly took it over to the lathe and I and I turned it out so it would fit the quarter perfectly then I turn the outside of the Hol to an inch and a quarter that would fit an inch and what is that I keep saying inch and a quarter I don't think it is it's an inch and an eigh so I board an an inch and eigh diameter hole turned the uh turned the Hol to fit mounted that in there flush and now that's what the magnet holds to so that stays put and of course when you take it off you'll find out where this was made up we wanted I wanted to be able to lock everything up uh so I have to show you how we did that for the drawers so this thing is called the adjust eror this is an invention we came up with a few years ago that makes adjusting your planes so much easier than turning that adjustment wheel but it wouldn't fit some of the smaller planes like the threes and some brands of number four so we made what was called a mini and we thought okay well this has work perfectly so what this does when I turn that like this it drops that brass pin down the brass pin is attached to a piece of bloodwood which is heavy the bloodwood has three brass pins and those three brass pins drop into those holes I showed you on the back each one of the drawers has a little brass P plate with a hole in it and those pins drop in and lock these securely when you want to open it you simply spin that in the other direction as soon as the brass pin comes up flush now you have access to your drawer and I'll just show you real quickly so there's one right there this one is in the middle and this one is on the left side and that just allowed me to keep all three pieces relatively close so I didn't have to have that stretch out over the entire width of the cabinet so when at the end of the night when you want to close everything up spin that down until it drops about an eighth of an inch now they're locked this unwinds now we didn't want this hanging out and I'll show you what I mean here so we had to make it spring-loaded so if I close the door now all you see is just two neat little brass whatever you want to call them and the pin is is back in there so that was the reason why the spring was here just to hold it in this place and when in the not used position and the used position obviously is going to be in there and locked and that will go in so that allows room for the saw to clear so drawers are locked this closes now I put a strip on here and I I put it on with brass screws intentionally and that one is a little forward than the next one but when this one closes and then this one comes around undone the same way got to close the little door that has your bits on it now you'll notice down here and uh the hardware that I bought I I wasn't happy with it all it was just too big and gy so I cut that down much smaller actually had to cut a little piece of Walnut and drop that down in the bottom just so it would it nice and neat and mounting this lock was not easy finally found one we had to order a couple before we found one that we thought was good and that lock had to be modified to fit in here and that then of course we had to put the sketching in now that's Mark right there that just needs needs another coat of oil on here this is actually had one coat needs more and then when you because of the position of this piece being forward of this one it holds this door locked I never remember which way to turn it and as you turn it it just just tightens it up enough keeps everything nice and secure so what would I have done differently well I mentioned that I would have used Holly I uh I think it's a it's a whiter wood whether or not it would have stayed white with the oil I don't know but in hindsight I would have used Holly the other thing I would have done differently is the Walnut itself if you look at the side I thought I took this all out of the same board but look at the contrast and the color this is chocolate Brown dark this is um dark chocolate this is milk chocolate and why that happened I have no idea I'm hoping that as it oxidizes it'll all come to the same color but same thing over here I I used the same couple of pieces of wood but look at the difference in the color of the different now this is actually veneer but if you look at the rest of these pieces a lot of them don't look the same at all but hopefully people will see past that and just say oh it's wood every piece of wood's a little bit different however when you know what you're doing you should be able to match your Woods up a little bit better than that overall I love it the idea that behind this is we are going to somehow use this as a fundraiser for the purple art project so we'll figure out a way we haven't yet come up with a way but uh at some point this is going to find a nice home somewhere and the funds from it are going to help fund our Purple Heart Project where we bring combat wounded veterans in six times a year and we treat them to a Six-Day Workshop where we teach them how to build the skills on how to build a piece of furniture like it was 200 years ago turns out that woodworking hand to woodworking is extremely therapeutic particularly from those suffering from traumatic brain injuries um um PTSD physical injuries whatever it happens to be anyway I hope you enjoyed this W is good see you if you like my work and enjoy my style of teaching click on any one of these videos and help take your woodwork to the next level I've always said better tools make the job so much easier if you click on the link below the Chisel and plane icon it'll take you to our site and introduce you to all the tools that we actually manufacture right here in our shop it'll also give you information on our online and in-person workshops ...
“+10,000 Step By Step Plans ...even if you don't have a large workshop or expensive tools!“ Download Today! 👈


No comments