small woodworking bench “+10,000 Step By Step Plans ...even if you don't have a large workshop or expensive tools!“ Yes, Get A...
 small woodworking bench
“+10,000 Step By Step Plans ...even if you don't have a large workshop or expensive tools!“ Yes, Get Access To 12,000 shed Plans! 👈
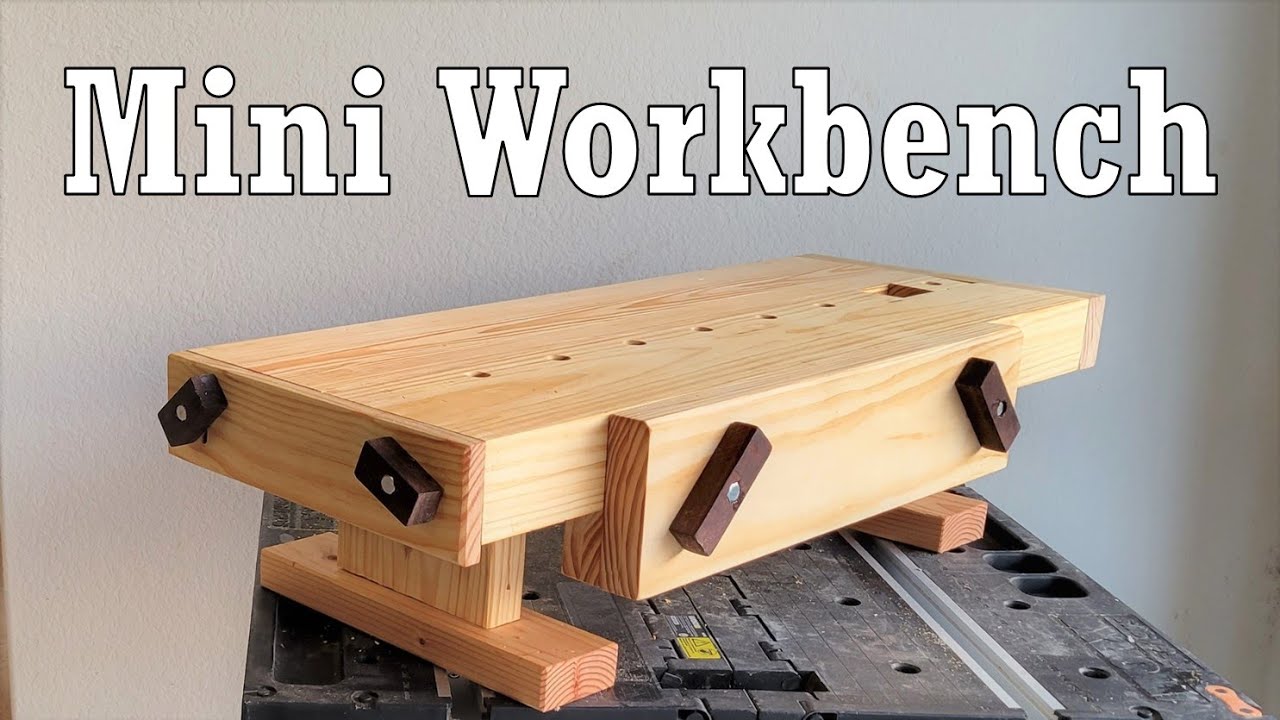
hey y'all today we're going to build a mini workbench to use while i transition between workshops i'm going to include a mocks invites like the one i built last year but also an integrated plane stop and a wagoner tail vise i'm using all standard hardware and pine construction lumber to keep the costs as low as possible as i really see this as a test build to see what i like before i eventually build a full-size workbench in my new workshop [Music] after cutting and gluing a few two by eights i trim the edges and planed them into square lumber to make up the work surface [Music] before gluing these together i went ahead and cut out the area for the tail vise so i'd have at least one clean side from one of the glued up boards and could use the cutoff as the actual block in the vise after gluing the two pieces together i needed to add two wood pieces to the tail vise slot to act as rails for the block to travel on to get pressure on the sides for the glue up i made small wedges to force into the gap by just planing down an angle on some scrap pieces for the block and the vise i created two channels in it so it could slide on those rails we just glued in with some chiseling sawing and finishing with a rabbet plane to get it real nice and smooth [Music] now to drill the hole in it for the bolt i broke out another one of my light grandfather's tools his drill press after being in storage for a while i gave it a good check to make sure it's good to go and then i drilled the hole all the way through the block for the bolt to travel through i want to add a spacer to this as the bolt moves through it that way it'll be frictionless and have less chance of catching after widening the hole for it i used its length to determine where the square nut should be inserted i chiseled out a spot for that nut and then could test assemble the whole setup [Music] the bolt goes in catches the nut the nut doesn't have room to spin and doesn't have much play back and forth so we should be good to go i glued up two pieces to act as my end boards and then went ahead and attached it with screws as this piece will likely need to come on and off quite a bit as i have to fix anything with this vise after marking where i drilled i pre-drilled all the holes and screwed it in place i went ahead and cleaned up the top and bottom of the board to get rid of any excess at this point now we need to drill a hole for the bolt to go through that's also large enough for another one of these spacers to go in [Music] once that was done we can test fit the block reattach the inboard and do the initial setup with the bolt it grabs the nut in the block and it still moves freely enough so the rough assembly here is a success now to move to the other side this is where we're going to put a plane stop using similar bolts and square nuts after drilling the hole for the bolt i marked and drilled a pilot hole for where the nut needs to be inserted after chiseling out a hole for the nut i set it in place and tested the bolts ability to catch it easily this works well using square nuts because as long as you keep the sides tight there's little chance of this nut being able to rotate and move unlike a more traditional hexagonal nut that's a little more circular i then made the board to act as the plane stop i drilled out several holes and then connected them with the chisel work to make a slot for the bolt to travel in [Music] i then test fit it and it can slide up and down with ease another rough assembly done now before i add the moxon vice i need to add legs as this vise will be taller than the side profile of this work surface i decided to use scraps and make two beefy legs with mortise and tenon joinery the feet have lips on all sides so that way i have unlimited clamping opportunities for this bench to make the tenons i cut out the corners and then i set my line with the chisel taking light passes down it and then across it to set the curve for the saw blade on the side of the line i want removed after doing this a few times i cut down to the depth required and then chiseled away the extra until i had a nice uniform tenon [Music] to make the morrises on the feet i used the drill press to remove most the material and then chiseled away the access [Music] the final fit took a few tries removing just a little from each tenon each time so that when it finally fit it was nice and snug [Music] after gluing the legs and feet i went ahead and cleaned up the bottom of the workbench to get a nice flat surface and then marked for the mortises to accept the legs after drilling out what i could i repeated the chisel process to clean them out until i had another snug fit [Music] [Music] i glued in the legs and after they dried it was time to work on the moxifies this glued up piece is what i want to use the face of the vice but it's taller than the side of the work surface so we will need to add another piece to the bottom of the workbench to make sure there's an even surface space on both sides of the vise after cleaning up the extra piece i drilled pocket holes and glued and screwed it to the bottom of the board [Music] we then need to add bolts in the similar way we did with the plane stop once the nuts are in we cleaned up the extra piece to make sure it was flat and flush with the side of the workbench then drilled the through holes in the face vise and then we test fit the bolts another successful rough assembly with that done it's time to start finishing the workbench making sure all the surfaces are flat even and flush as we're starting to add some chamfers to both break the corners and add some detail to the workbench [Music] after making sure the tail vise top was flush i went ahead and flattened the rest of the top of the work surface the top was looking great and the feet were looking a little placed though looking like the store-bought lumber so i went ahead and flattened and added chamfers to all the feet and legs to better tie it in with the rest of the build now the last thing we need to make are the actual handles i cut small pieces out of this walnut and then drilled holes for the bolts to pass through them i then marked and chiseled out the space for the bolt heads keeping it as tight as possible to keep them from slipping while being turned with a little extra force this bolt sets in the hole nicely after a light sanding it was time for final assembly [Music] for the tail vise the last missing piece was the addition of a washer and a locking collar on the inside of the inboard this is what keeps the handle from moving back and forth causing the block to move up and down the bolt as it gets turned with the moxon vise on it was time to drill the dog holes [Music] i went sparingly with just one row of them again not having used them before we'll see how i like that and i can always add more later after that a coat of tongue oil to give it some moisture protection [Music] i did go back and add some glue to the handles to make sure they don't come off and separate from the bolts [Music] with that we can call this build done the plane stop moves up and down great and the tail vise works better than i imagined especially being built from just standard store hardware that's all for this build we'll see how it holds up as we use it in future projects but i'm excited to put it to good use if you like this video like comment and subscribe and i will see you on the next project thanks [Music] [Music] you ...
“+10,000 Step By Step Plans ...even if you don't have a large workshop or expensive tools!“ Download Today! 👈


No comments